
Notice
Recent Posts
Recent Comments
Link
| 일 | 월 | 화 | 수 | 목 | 금 | 토 |
|---|---|---|---|---|---|---|
| 1 | 2 | 3 | 4 | |||
| 5 | 6 | 7 | 8 | 9 | 10 | 11 |
| 12 | 13 | 14 | 15 | 16 | 17 | 18 |
| 19 | 20 | 21 | 22 | 23 | 24 | 25 |
| 26 | 27 | 28 | 29 | 30 | 31 |
Tags
- map
- RxCocoa
- clean architecture
- 리펙토링
- UICollectionView
- 애니메이션
- Clean Code
- Human interface guide
- claude code
- 리팩토링
- Protocol
- HIG
- Xcode
- ios
- rxswift
- uitableview
- UITextView
- tableView
- swiftUI
- swift documentation
- uiscrollview
- 클로드코드
- SWIFT
- 스위프트
- MVVM
- combine
- 클린 코드
- Refactoring
- Observable
- collectionview
Archives
- Today
- Total
김종권의 iOS 앱 개발 알아가기
[iOS - swift] 1. 상단 탭과 하단 수평 스크롤 UI 구현 방법 - 상단 TabHeaderView 구현 (UICollectionView) 본문
UI 컴포넌트 (swift)
[iOS - swift] 1. 상단 탭과 하단 수평 스크롤 UI 구현 방법 - 상단 TabHeaderView 구현 (UICollectionView)
jake-kim 2023. 1. 16. 03:181. 상단 탭과 하단 수평 스크롤 UI 구현 방법 - 상단 TabHeaderView 구현 (UICollectionView) <
2. 상단 탭과 하단 수평 스크롤 UI 구현 방법 - 하단 수평 스크롤 콘텐츠 구현 (UIPageViewController)
구현 아이디어
- 상단 스크롤은 collectionView를 사용하여 구현 (scrollView의 scrollDirection = .horizontal 사용)
- UIScrollView도 사용할 수 있지만, 동일한 화면이 반복적으로 필요하고, 어떤 셀이 선택되었는지 쉽게 구하려면 UICollectionView를 사용하는 것이 편리
- 하단 콘텐츠는 pageViewController를 사용하여 왼쪽, 오른쪽으로 ViewController들을 넘길 수 있도록 구현
- 상단 스크롤, 하단 콘텐츠 모두 클라이언트 코드 쪽 한 곳에서 관리하도록 구현
- 상태 관리를 여러곳에서 하지 않고 한 곳에서 해야, 상태가 변경되었을때 어디서 변경되는지 쉽게 확인할 수 있고 유지보수에 용이히기 때문
- 뷰 상태 관리(isSelected 등)도 모두 클라이언트 코드에게 위임하도록 구현

TabHeaderView 구현

* 예제 구현에 사용한 의존성
# UI
pod 'Then'
pod 'SnapKit'

# Rx
pod 'RxSwift'
pod 'RxCocoa'
pod 'RxSwiftExt'- 셀 구현
- button 하나 있는 셀
- Reactive extension으로 인터페이스 제공
- prepare: dataSources를 초기화
- onTap: 탭되었을때, 클라이언트 코드에서 하단 콘텐츠에도 싱크시킬때 사용될 인터페이스
final class HeaderCell: UICollectionViewCell {
    // MARK: Constants
    static let id = "HeaderCell"

    // MARK: UIs
    fileprivate let titleButton = UIButton().then {
        $0.setTitleColor(.lightGray, for: .normal)
        $0.setTitleColor(.black, for: .highlighted)
        $0.setTitleColor(.black, for: .selected)
    }

    // MARK: Properties
    private(set) var disposeBag = DisposeBag()

    // MARK: Initializers
    @available(*, unavailable)
    required init?(coder: NSCoder) {
        fatalError("init(coder:) has not been implemented")
    }

    override init(frame: CGRect) {
        super.init(frame: frame)

        setupLayouts()
    }

    // MARK: Methods
    private func setupLayouts() {
        contentView.addSubview(titleButton)

        titleButton.snp.makeConstraints {
            $0.edges.equalToSuperview()
        }
    }

    override func prepareForReuse() {
        super.prepareForReuse()

        disposeBag = DisposeBag()
        rx.prepare.onNext(nil)
    }
}

extension Reactive where Base: HeaderCell {
    var prepare: Binder<HeaderItemType?> {
        Binder(base) { base, itemType in
            base.titleButton.setTitle(itemType?.title, for: .normal)
            base.titleButton.setTitle(itemType?.title, for: .selected)
            base.titleButton.isSelected = itemType?.isSelected ?? false
        }
    }

    var onTap: Observable<Void> {
        base.titleButton.rx.tap.mapTo(()).asObservable()
    }
}- 위에서 정의한 cell을 이용하여 TabHeaderView 구현
- collectionView와 underlineView가 존재하는 뷰
- 인터페이스, 델리게이트는 아래에서 계속
typealias UpdateHeaderItemType = (Int, HeaderItemType)

struct HeaderItemType {
    let title: String
    var isSelected: Bool
}

final class TabHeaderView: UIView {
    // MARK: Constants
    fileprivate enum Metric {
        static let interItemSpacing = 12.0
        static let underlineViewHeight = 4.0
        static let underlineViewTopSpacing = 6.0
        static let collectionViewBottomSpacing = underlineViewHeight + underlineViewTopSpacing
        static let duration = 0.2
    }

    // MARK: UI
    fileprivate let collectionView = UICollectionView(
        frame: .zero,
        collectionViewLayout: UICollectionViewFlowLayout().then {
            $0.scrollDirection = .horizontal
            $0.minimumInteritemSpacing = Metric.interItemSpacing
        }
    ).then {
        $0.isScrollEnabled = true
        $0.showsHorizontalScrollIndicator = false
        $0.showsVerticalScrollIndicator = false
        $0.contentInset = .zero
        $0.backgroundColor = .clear
        $0.clipsToBounds = true
        $0.register(HeaderCell.self, forCellWithReuseIdentifier: HeaderCell.id)
    }
    fileprivate let underlineView = UIView().then {
        $0.backgroundColor = .gray
    }

    // MARK: Properties
    fileprivate var items = [HeaderItemType]()
    fileprivate let disposeBag = DisposeBag()
    fileprivate let selectedPublish = PublishSubject<Int>()

    // MARK: Initializers
    init() {
        super.init(frame: .zero)
        setUp()
    }

    @available(*, unavailable)
    required init?(coder: NSCoder) {
        fatalError("init() has not been implemented")
    }

    // MARK: Layout
    private func setUp() {
        addSubview(collectionView)
        addSubview(underlineView)

        collectionView.snp.makeConstraints {
            $0.top.left.right.equalToSuperview()
            $0.bottom.equalToSuperview().inset(Metric.collectionViewBottomSpacing)
        }

        collectionView.dataSource = self
        collectionView.delegate = self

        DispatchQueue.main.async {
	        self.rx.updateUnderline.onNext(0)
        }
    }

    fileprivate func itemSize(index: Int) -> CGSize {
        items[index].title.size(OfFont: .systemFont(ofSize: 18))
    }
}- 데이터소스
- selectedPublish를 사용하여 내부에서 탭 이벤트를 방출하고, Reactive extension으로 클라이언트 코드에게 탭 이벤트를 제공(아래에서 계속)
extension TabHeaderView: UICollectionViewDataSource {
    func collectionView(_ collectionView: UICollectionView, numberOfItemsInSection section: Int) -> Int {
        items.count
    }

    func collectionView(_ collectionView: UICollectionView, cellForItemAt indexPath: IndexPath) -> UICollectionViewCell {
        guard
            let cell = collectionView.dequeueReusableCell(withReuseIdentifier: HeaderCell.id, for: indexPath) as? HeaderCell
        else { return UICollectionViewCell() }

        Observable
            .just(items[indexPath.item])
            .bind(to: cell.rx.prepare)
            .disposed(by: cell.disposeBag)

        cell.rx.onTap
            .mapTo(indexPath.item)
            .bind(to: selectedPublish.asObserver())
            .disposed(by: cell.disposeBag)

        return cell
    }
}- Reactive extension으로 인터페이스 제공
- onIndexSelected: collectionView에서 탭 이벤트를 그대로 클라이언트 코드에게 전달하고, underline을 변경
- setItems: 데이터소스 setter 역할
- updateCells: 데이터소스 안에 isSelected 데이터도 있는데, 이 데이터를 업데이트 되고나서 셀에 반영하기 위해 필요한 인터페이스
- updateUnderline: 언더라인 뷰 업데이트
extension Reactive where Base: TabHeaderView {
    var onIndexSelected: Observable<Int> {
        base.selectedPublish.asObservable()
    }

    var setItems: Binder<[HeaderItemType]> {
        Binder(base) { base, items in
            base.items = items
        }
    }

    var updateCells: Binder<[UpdateHeaderItemType]> {
        Binder(base) { base, items in
            items.forEach { ind, item in
                base.items[ind] = item
            }
            let indexPaths = items.map { ind, item in IndexPath(item: ind, section: 0) }
            UIView.performWithoutAnimation {
                base.collectionView.reloadItems(at: indexPaths)
            }
        }
    }

    var updateUnderline: Binder<Int> {
        Binder(base) { base, index in
            let indexPath = IndexPath(item: index, section: 0)
            guard let cell = base.collectionView.cellForItem(at: indexPath) else { return }
            base.underlineView.snp.remakeConstraints {
                $0.left.right.equalTo(cell)
                $0.bottom.equalTo(cell).offset(TabHeaderView.Metric.underlineViewTopSpacing)
                $0.height.equalTo(TabHeaderView.Metric.underlineViewHeight)
            }
            UIView.animate(withDuration: TabHeaderView.Metric.duration, delay: 0, animations: base.layoutIfNeeded)
        }
    }

    private func updateCellLayout(_ cell: UICollectionViewCell) {
        base.underlineView.snp.remakeConstraints {
            $0.left.right.equalTo(cell)
            $0.bottom.equalTo(cell).offset(TabHeaderView.Metric.underlineViewTopSpacing)
            $0.height.equalTo(TabHeaderView.Metric.underlineViewHeight)
        }
        UIView.animate(withDuration: TabHeaderView.Metric.duration, delay: 0, animations: base.layoutIfNeeded)
    }
}
클라이언트 코드 (사용하는 쪽)
- ViewController안에 위에서 구현한 tabHeaderView 선언
class ViewController: UIViewController {
    // MARK: Constants
    private enum Metric {
        static let headerHeight = 56.0
        static let headerViewHorizontalInset = 12.0
    }

    // MARK: UI
private let tabHeaderView = TabHeaderView()- 필요한 프로퍼티도 선언
// MARK: Properties
private let disposeBag = DisposeBag()
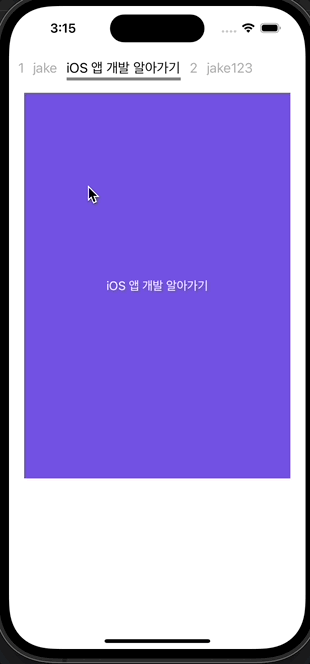
private var items = ["1", "jake", "iOS 앱 개발 알아가기", "2", "jake123"]
.enumerated()
.map { index, str in HeaderItemType(title: str, isSelected: index == 0) }
private var lastSelectedIndex: Int {
items.firstIndex(where: { $0.isSelected }) ?? 0
}- viewDidLoad에서 레이아웃 업데이트, 바인딩 호출
- 핵심은 바인딩 - 바인딩에서 특정 뷰의 탭 이벤트가 발생했을때, 클라이언트 코드에서 데이터를 들고 한 곳에서만 관리하도록 설게했기 때문에 데이터 소스를 업데이트하고, 다시 뷰에 알리는 방식
    override func viewDidLoad() {
        super.viewDidLoad()

        setUpLayouts()
        bindTabHeader()
    }

    private func setUpLayouts() {
        view.addSubviews(
            tabHeaderView
        )

        tabHeaderView.snp.makeConstraints {
            $0.top.equalTo(view.safeAreaLayoutGuide)
            $0.left.right.equalToSuperview().inset(Metric.headerViewHorizontalInset)
            $0.height.equalTo(Metric.headerHeight)
        }
    }

    private func bindTabHeader() {
        Observable
            .just(items)
            .bind(to: tabHeaderView.rx.setItems)
            .disposed(by: disposeBag)

        tabHeaderView.rx.onIndexSelected
            .distinctUntilChanged()
            .observe(on: MainScheduler.instance)
            .bind(with: self) { ss, newSelectedIndex in
                ss.updateTapHeaderCell(newSelectedIndex)
            }
            .disposed(by: disposeBag)
    }

    private func updateTapHeaderCell(_ index: Int) {
        let lastSelectedIndex = lastSelectedIndex
        guard index != lastSelectedIndex else { return }

        items[lastSelectedIndex].isSelected = false
        items[index].isSelected = true

        let updateHeaderItemTypes = [
            UpdateHeaderItemType(lastSelectedIndex, items[lastSelectedIndex]),
            UpdateHeaderItemType(index, items[index])
        ]

        tabHeaderView.rx.updateUnderline.onNext(index)

        Observable
            .just(updateHeaderItemTypes)
            .take(1)
            .filter { !$0.isEmpty }
            .bind(to: tabHeaderView.rx.updateCells)
            .disposed(by: disposeBag)
    }
}
(완성)

'UI 컴포넌트 (swift)' 카테고리의 다른 글
'UI 컴포넌트 (swift)' Related Articles
more


Comments