Notice
Recent Posts
Recent Comments
Link
| 일 | 월 | 화 | 수 | 목 | 금 | 토 |
|---|---|---|---|---|---|---|
| 1 | 2 | 3 | 4 | 5 | 6 | 7 |
| 8 | 9 | 10 | 11 | 12 | 13 | 14 |
| 15 | 16 | 17 | 18 | 19 | 20 | 21 |
| 22 | 23 | 24 | 25 | 26 | 27 | 28 |
Tags
- tableView
- HIG
- Protocol
- UICollectionView
- map
- uiscrollview
- UITextView
- Refactoring
- scrollview
- combine
- SWIFT
- 리팩토링
- 리펙토링
- Human interface guide
- Observable
- RxCocoa
- swift documentation
- 애니메이션
- 클린 코드
- 스위프트
- collectionview
- uitableview
- Clean Code
- Xcode
- ribs
- swiftUI
- rxswift
- ios
- clean architecture
- MVVM
Archives
- Today
- Total
김종권의 iOS 앱 개발 알아가기
[iOS - swift] UIView.animate와 UIView.transition 차이 본문
UIView.animate와 UIView.transition 차이
- UIView.animate
- 뷰의 상태에 관한 프로퍼티 변환에 대해서 적용
- ex) alpha, backgroundColor 값 변경
- UIView.transition
- 뷰를 다른 뷰로 '변경'할 때 애니메이션 적용
- ex) 뷰 변경, UIImage 변경 (UIImage는 뷰가 아니지만 UIView.animate는 동작 안하는것을 주의)
UIView.transition에서만 적용되는 것
- UIView.transition을 사용하면 UIView.animate에서 되는 것들은 모두 되므로, UIView.transition에서만 되는 것을 파악하는 것이 중요
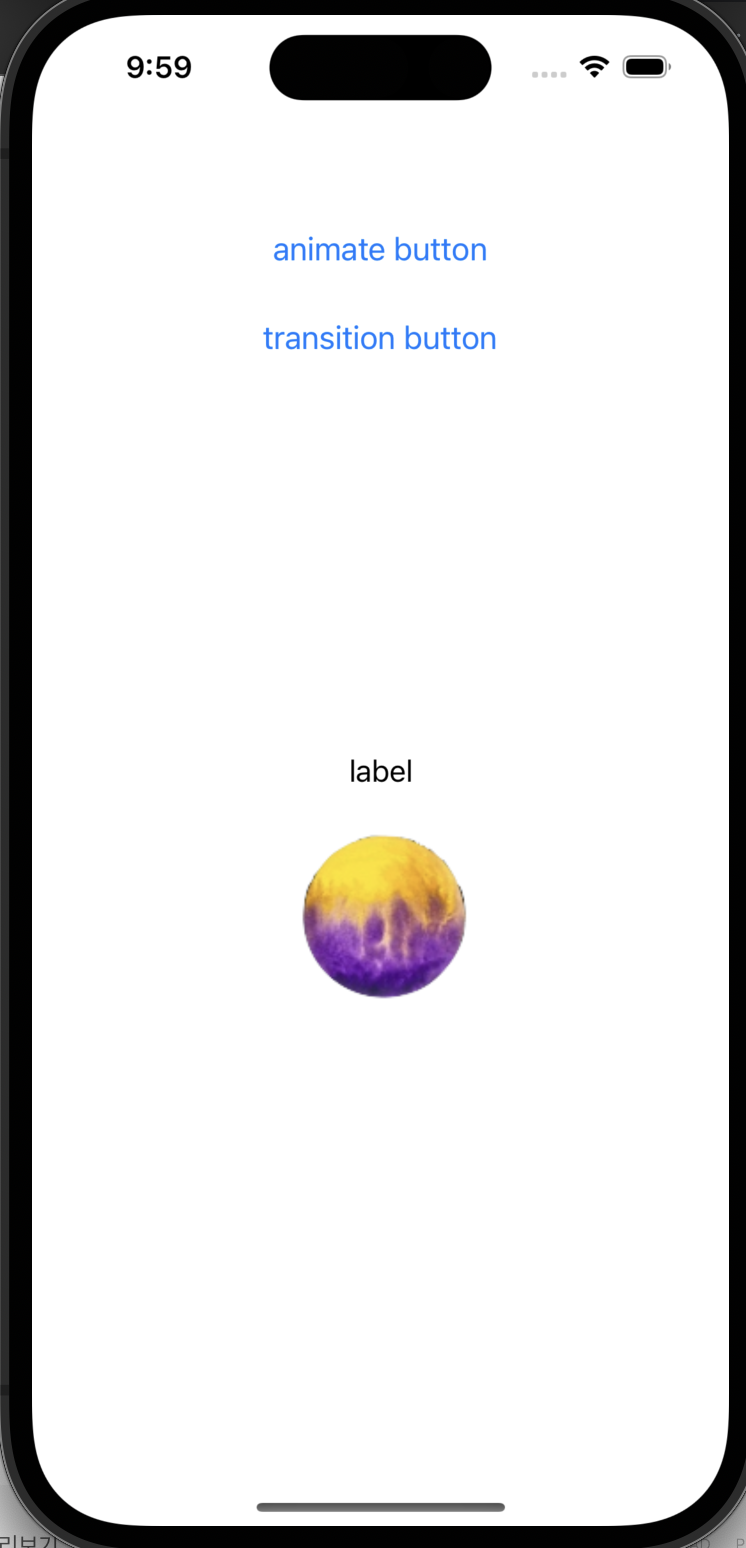
ex) 예제에 사용할 뷰 준비

import UIKit

class ViewController: UIViewController {
    private let animateButton: UIButton = {
        let button = UIButton()
        button.setTitle("animate button", for: .normal)
        button.setTitleColor(.systemBlue, for: .normal)
        button.setTitleColor(.blue, for: .highlighted)
        button.addTarget(self, action: #selector(tapAnimateButton), for: .touchUpInside)
        button.translatesAutoresizingMaskIntoConstraints = false
        return button
    }()
    private let transitionButton: UIButton = {
        let button = UIButton()
        button.setTitle("transition button", for: .normal)
        button.setTitleColor(.systemBlue, for: .normal)
        button.setTitleColor(.blue, for: .highlighted)
        button.addTarget(self, action: #selector(tapTransitionButton), for: .touchUpInside)
        button.translatesAutoresizingMaskIntoConstraints = false
        return button
    }()
    private let label: UILabel = {
        let label = UILabel()
        label.text = "label"
        label.textColor = .black
        label.translatesAutoresizingMaskIntoConstraints = false
        return label
    }()
    private let myImageView: UIImageView = {
        let view = UIImageView()
        view.image = UIImage(named: "blog")
        view.translatesAutoresizingMaskIntoConstraints = false
        return view
    }()

    override func viewDidLoad() {
        super.viewDidLoad()

        view.addSubview(animateButton)
        view.addSubview(transitionButton)
        view.addSubview(label)
        view.addSubview(myImageView)

        NSLayoutConstraint.activate([
            animateButton.topAnchor.constraint(equalTo: view.safeAreaLayoutGuide.topAnchor, constant: 56),
            animateButton.centerXAnchor.constraint(equalTo: view.centerXAnchor),
        ])

        NSLayoutConstraint.activate([
            transitionButton.topAnchor.constraint(equalTo: animateButton.bottomAnchor, constant: 16),
            transitionButton.centerXAnchor.constraint(equalTo: view.centerXAnchor),
        ])

        NSLayoutConstraint.activate([
            label.centerYAnchor.constraint(equalTo: view.centerYAnchor),
            label.centerXAnchor.constraint(equalTo: view.centerXAnchor),
        ])

        NSLayoutConstraint.activate([
            myImageView.topAnchor.constraint(equalTo: label.bottomAnchor, constant: 16),
            myImageView.centerXAnchor.constraint(equalTo: view.centerXAnchor),
        ])
    }

    @objc private func tapAnimateButton() {
        UIView.animate(
            withDuration: 2,
            delay: 0,
            options: .curveEaseOut,
            animations: {
                self.view.backgroundColor = .lightGray.withAlphaComponent(0.3)
                self.label.alpha = 0
                self.label.font = .systemFont(ofSize: 50)

                // 적용 x (UIView.transition만 적용됨)
                self.myImageView.image = UIImage(named: "img2")
            }
        )
    }

    @objc private func tapTransitionButton() {
		// TODO
    }
}- UIImageView에서 UIImage 변경하는 경우
@objc private func tapTransitionButton() {
    UIView.transition(
        with: view,
        duration: 2,
        options: .transitionCrossDissolve,
        animations: {
            self.myImageView.image = UIImage(named: "img2")
        }
    )
}

(만약 animate로 애니메이션 주면 동작 x)
UIView.animate(
    withDuration: 2,
    delay: 0,
    options: .transitionCrossDissolve,
    animations: {
        // 적용 x (UIView.transition만 적용됨)
        self.myImageView.image = UIImage(named: "img2")
    }
)
- 애니메이션 옵션 중 뷰 전환에 관한 애니메이션을 사용하는 경우
- 대표적인 transitionFlipFromBottom 옵션을 적용
UIView.transition(
    with: myImageView,
    duration: 2,
    options: .transitionFlipFromBottom, // <-
    animations: {
        self.myImageView.image = UIImage(named: "img2")
    }
)
- 만약 UIView.animate로 하면 애니메이션 적용 x
UIView.animate(
    withDuration: 2,
    delay: 0,
    options: .transitionFlipFromBottom, // <-
    animations: {
        self.myImageView.image = UIImage(named: "img2")
    }
)
응용) UIView.transition을 사용하여 cell의 highlighted를 더욱 돋보이게 하기 - 이전 포스팅 글 참고
* 전체 코드: https://github.com/JK0369/ExAnimationTransition
* 참고
https://developer.apple.com/documentation/uikit/uiview/1622451-animate
https://developer.apple.com/documentation/uikit/uiview/1622574-transition
'iOS 응용 (swift)' 카테고리의 다른 글
Comments


