Notice
Recent Posts
Recent Comments
Link
| 일 | 월 | 화 | 수 | 목 | 금 | 토 |
|---|---|---|---|---|---|---|
| 1 | 2 | 3 | 4 | 5 | 6 | 7 |
| 8 | 9 | 10 | 11 | 12 | 13 | 14 |
| 15 | 16 | 17 | 18 | 19 | 20 | 21 |
| 22 | 23 | 24 | 25 | 26 | 27 | 28 |
Tags
- collectionview
- swift documentation
- MVVM
- ribs
- ios
- tableView
- uiscrollview
- Protocol
- UITextView
- map
- 리팩토링
- HIG
- combine
- clean architecture
- Refactoring
- Human interface guide
- rxswift
- 애니메이션
- 클린 코드
- uitableview
- SWIFT
- Observable
- 스위프트
- Xcode
- 리펙토링
- UICollectionView
- swiftUI
- scrollview
- RxCocoa
- Clean Code
Archives
- Today
- Total
김종권의 iOS 앱 개발 알아가기
[iOS - swift] 2. touch indicator 구현 방법 - DebugTouchesWindow, Touch Indicator 본문
iOS 응용 (swift)
[iOS - swift] 2. touch indicator 구현 방법 - DebugTouchesWindow, Touch Indicator
jake-kim 2023. 11. 12. 01:531. touch indicator 구현 방법 - 기초 개념 sendEvent(_:), UIEvent (allTouches, UITouch, phase)
2. touch indicator 구현 방법 - DebugTouchesWindow, Touch Indicator

구현 아이디어
- window의 sendEvent에서 touch view를 삽입
- sendEvent 메서드 인자로 들어오는 event의 phase를 보면 began, ended를 알 수 있기 때문에 began에서 뷰를 넣어주고, ended에서 뷰를 삭제
커스텀 Window 구현
- UIWindow 상속하여 커스텀 윈도우 구현
open class TouchesWindow: UIWindow {
}- 필요한 property와 sendEvent 선언
    public var touchesEnabled: Bool = false {
        didSet {
            if !touchesEnabled {
                touchInfoSet.forEach({ $0.view.removeFromSuperview() })
            }
        }
    }

    private var touchInfoSet = Set<TouchInfo>()

    open override func sendEvent(_ event: UIEvent) {
    ...
}- sendEvent에서 touch를 처리
    open override func sendEvent(_ event: UIEvent) {
        defer { super.sendEvent(event) }

        guard let allTouches = event.allTouches else { return }

        var beganTouches = Set<UITouch>()
        var endedTouches = Set<UITouch>()

        allTouches
            .forEach { touch in
                switch touch.phase {
                case .began:
                    beganTouches.insert(touch)
                case .ended, .cancelled:
                    endedTouches.insert(touch)
                default:
                    // .moved, .stationary, .regionEntered, .regionMoved, .regionExited:
                    break
                }
            }

        handleTouchesBegan(touches: beganTouches)
        handleTouchesMoved(touches: allTouches)
        handleTouchesEnded(touches: endedTouches)

        super.sendEvent(event)
}- began, moved, ended에서 각 터치에 관한 처리 수행
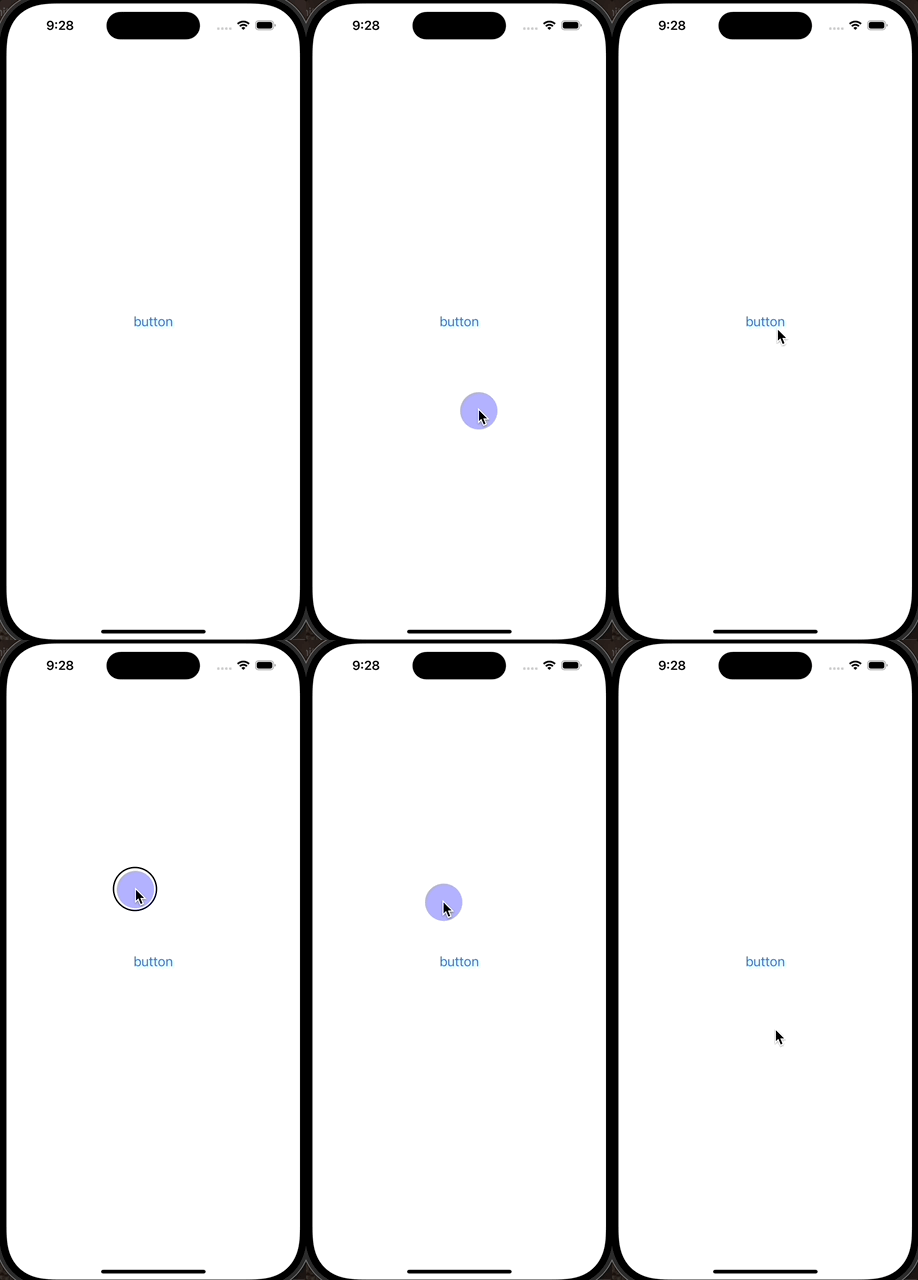
- began에서는 뷰를 추가하는 기능
- moved에서는 추가된 뷰의 center 좌표를 수정하는 기능
- ended에서는 뷰를 삭제하는 기능
    private func getTouchInfo(forTouch touch: UITouch) -> TouchInfo? {
        touchInfoSet.first(where: { $0.touch == touch })
    }

    private func handleTouchesBegan(touches: Set<UITouch>) {
        touches
            .forEach { touch in
                let view = TouchView()
                view.layer.zPosition = .greatestFiniteMagnitude
                let touchInfo = TouchInfo(touch: touch, view: view)

                touchInfoSet.insert(touchInfo)
                addSubview(view)
            }
    }

    private func handleTouchesMoved(touches: Set<UITouch>) {
        touches
            .forEach { touch in
                let touchInfo = getTouchInfo(forTouch: touch)
                touchInfo?.view.center = touchInfo?.touch.location(in: self) ?? .zero
            }
    }

    func handleTouchesEnded(touches: Set<UITouch>) {
        touches
            .compactMap { getTouchInfo(forTouch: $0) }
            .forEach { touchInfo in
                touchInfo.view.removeFromSuperview()
                touchInfoSet.remove(touchInfo)
            }
}- TouchView와 TouchInfo는 아래처럼 구현
- TouchView는 둥그란 모양의 터치되었을때 등장하는 뷰
- TouchInfo는 touch와 view 정보를 가지고 있는 클래스
// MARK: TouchView

private class TouchView : UIView {
    public init() {
        super.init(frame: .init(x: 0, y: 0, width: 50, height: 50))
        backgroundColor = .blue.withAlphaComponent(0.3)
    }

    required init?(coder aDecoder: NSCoder) {
        fatalError("init(coder:) has not been implemented")
    }

    override func layoutSubviews() {
        super.layoutSubviews()
        layer.cornerRadius = frame.height / 2
    }
}

// MARK: TouchInfo

private class TouchInfo: Hashable {
    let touch: UITouch
    let view: TouchView

    init(touch: UITouch, view: TouchView) {
        self.touch = touch
        self.view = view
    }

    func hash(into hasher: inout Hasher) {
        hasher.combine(touch.hashValue)
    }

    public static func ==(lhs: TouchInfo, rhs: TouchInfo) -> Bool {
        lhs.touch == rhs.touch
    }
}'iOS 응용 (swift)' 카테고리의 다른 글
Comments


