Notice
Recent Posts
Recent Comments
Link
| 일 | 월 | 화 | 수 | 목 | 금 | 토 |
|---|---|---|---|---|---|---|
| 1 | 2 | 3 | 4 | 5 | 6 | 7 |
| 8 | 9 | 10 | 11 | 12 | 13 | 14 |
| 15 | 16 | 17 | 18 | 19 | 20 | 21 |
| 22 | 23 | 24 | 25 | 26 | 27 | 28 |
Tags
- Refactoring
- tableView
- Protocol
- MVVM
- UITextView
- 리펙토링
- 스위프트
- Observable
- scrollview
- UICollectionView
- 리팩토링
- rxswift
- uitableview
- clean architecture
- Human interface guide
- Xcode
- collectionview
- combine
- HIG
- swift documentation
- RxCocoa
- uiscrollview
- swiftUI
- 애니메이션
- map
- ios
- SWIFT
- ribs
- 클린 코드
- Clean Code
Archives
- Today
- Total
김종권의 iOS 앱 개발 알아가기
[iOS - SwiftUI] PreferenceKey, onPreferenceChange (자식뷰에서 부모뷰로 데이터 변경 알리기, 데이터 바인딩) 본문
iOS 응용 (SwiftUI)
[iOS - SwiftUI] PreferenceKey, onPreferenceChange (자식뷰에서 부모뷰로 데이터 변경 알리기, 데이터 바인딩)
jake-kim 2024. 10. 29. 01:05PreferenceKey
- 일종의 키 이며, 이 키를 이용하여 특정 값을 변경될때마다 관찰할 수가 있음

- PreferenceKey로 데이터를 뿌리면, 이 데이터에 관심있는 쪽에서 해당 PreferenceKey로 옵저빙이 가능
- 가장 대표적인 사용 방법은 자식뷰 -> 부모뷰로 데이터를 넘길때 사용
- UIKit에서는 델리게이트나 closure로 넘기지만 SwiftUI에서는 PreferenceKey라는 것이 존재
사용방법
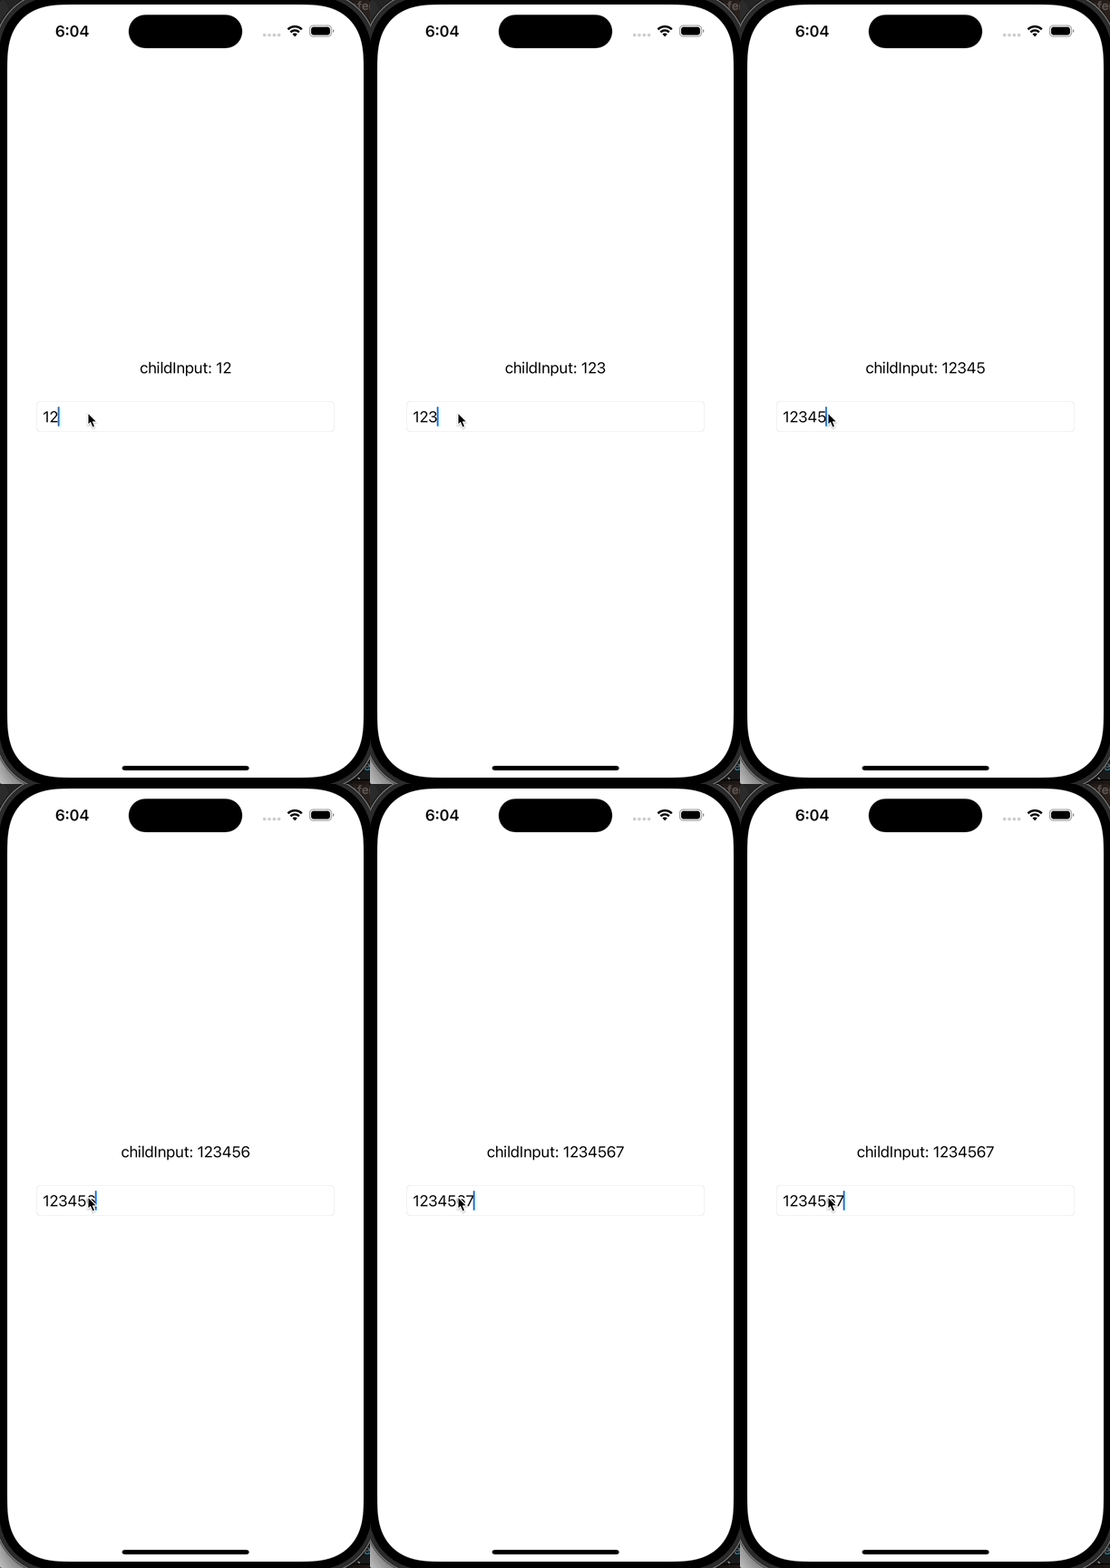
- ex) 자식뷰에서 TextView에 데이터가 입력될때마다 부모 뷰에 전달하고 싶은 경우?
- 자식뷰 준비
struct ChildView: View {
    @State private var inputText = ""

    var body: some View {
        VStack {
            TextField("Enter text...", text: $inputText)
                .textFieldStyle(RoundedBorderTextFieldStyle())
                .padding()
        }
    }
}- inputText를 특정 키로 데이터를 방출해야하므로 키 정의 (PreferenceKey)
- PreferenceKey은 프로토콜이며, defaultValue, reduce함수를 필수로 구현해주어야함
- defaultValue는 처음 방출할 값
- reduce함수는, value가 리턴값이라 생각하면 되고, nextValue()는 최신 값
struct TypingPreferenceKey: PreferenceKey {
    static var defaultValue = ""
    static func reduce(value: inout String, nextValue: () -> String) {
        value = nextValue()
    }
}- 이 키를 가지고, 데이터를 방출해야하므로 childView에 preference(key:value:)로 등록
- 이렇게 정의하면 위 reduce함수에서 들어오는 파라미터 nextValue()는 inputText값이 들어옴
struct ChildView: View {
    @State private var inputText = ""

    var body: some View {
        VStack {
            TextField("Enter text...", text: $inputText)
                .textFieldStyle(RoundedBorderTextFieldStyle())
                .padding()
                .preference(key: TypingPreferenceKey.self, value: inputText) // <-
        }
    }
}- 이 키를 가지고 옵저빙할 수 있으므로 부모뷰에서 옵저빙
- preonPreferenceChange(_:perform:) 사용
struct ContentView: View {
    @State var childInput = ""

    var body: some View {
        VStack {
            Text("childInput: \(childInput)")
            ChildView()
                .onPreferenceChange(TypingPreferenceKey.self, perform: { value in // <-
                    childInput = value
                })
        }
        .padding()
    }
}
결과)

정리
- 자식뷰 -> 부모뷰 데이터 전달 시, Binding 변수를 넘기거나 Delegate 방법도 있지만 위에서 본것처럼 PreferenceKey도 가능
- PreferenceKey의 가장 큰 특징은 전역적으로 접근이 가능 (PreferenceKey를 정의하면 이 타입만 옵저빙이 가능)
전체 코드)
import SwiftUI

struct ContentView: View {
    @State var childInput = ""

    var body: some View {
        VStack {
            Text("childInput: \(childInput)")
            ChildView()
                .onPreferenceChange(TypingPreferenceKey.self, perform: { value in
                    childInput = value
                })
        }
        .padding()
    }
}

struct ChildView: View {
    @State private var inputText = ""

    var body: some View {
        VStack {
            TextField("Enter text...", text: $inputText)
                .textFieldStyle(RoundedBorderTextFieldStyle())
                .padding()
                .preference(key: TypingPreferenceKey.self, value: inputText) // <-
        }
    }
}

struct TypingPreferenceKey: PreferenceKey {
    static var defaultValue = ""
    static func reduce(value: inout String, nextValue: () -> String) {
        value = nextValue()
    }
}

#Preview {
    ContentView()
}
* 읽어보면 좋은 글: PreferenceKey를 사용하여 ScrollView 스크롤 하단 도달했는지 확인 방법, ContentOffset 구하는 방법
'iOS 응용 (SwiftUI)' 카테고리의 다른 글
Comments


