Notice
Recent Posts
Recent Comments
Link
| 일 | 월 | 화 | 수 | 목 | 금 | 토 |
|---|---|---|---|---|---|---|
| 1 | 2 | 3 | 4 | 5 | 6 | 7 |
| 8 | 9 | 10 | 11 | 12 | 13 | 14 |
| 15 | 16 | 17 | 18 | 19 | 20 | 21 |
| 22 | 23 | 24 | 25 | 26 | 27 | 28 |
Tags
- 리팩토링
- uitableview
- 리펙토링
- UITextView
- 스위프트
- Observable
- uiscrollview
- clean architecture
- swift documentation
- Human interface guide
- Xcode
- MVVM
- HIG
- Protocol
- collectionview
- swiftUI
- combine
- tableView
- scrollview
- Clean Code
- map
- rxswift
- 애니메이션
- UICollectionView
- 클린 코드
- ios
- ribs
- SWIFT
- RxCocoa
- Refactoring
Archives
- Today
- Total
김종권의 iOS 앱 개발 알아가기
[iOS - swift] 1. 메모리 프로파일링 - VM Tracker 사용 방법(#Instrument) 본문
iOS 응용 (swift)
[iOS - swift] 1. 메모리 프로파일링 - VM Tracker 사용 방법(#Instrument)
jake-kim 2023. 12. 29. 01:351. 메모리 프로파일링 - VM Tracker 사용 방법 (#Instrument)
2. 메모리 프로파일링 - VM Tracker을 사용하여 메모리 프로파일링하기 (resident size, dirty size, swapped size, virtual size
VM Tracker란?
- Virutal Memory Tracker라는 의미로, XCode에서 Instrument 중 메모리 할당에 관한 프로파일링 기법 중 하나
- VM Tracker를 이용하면 resident size, dirty size, swapped size, virtual size를 분석 할 수 있는데, 이렇게 각 size별로 볼 수 있어서 더욱 디테일하게 메모리 프로파일링이 가능
- residen size, dirty size, swapped size, virtual size에 관한 내용은 이전 포스팅, iOS 메모리 기초 개념 글 참고
VM Tracker 사용 방법
- Xcode > Instrument 실행 (단축키, cmd + I)
- Allocations 선택

- + 버튼 클릭

- VM Tracker를 검색하여 선택

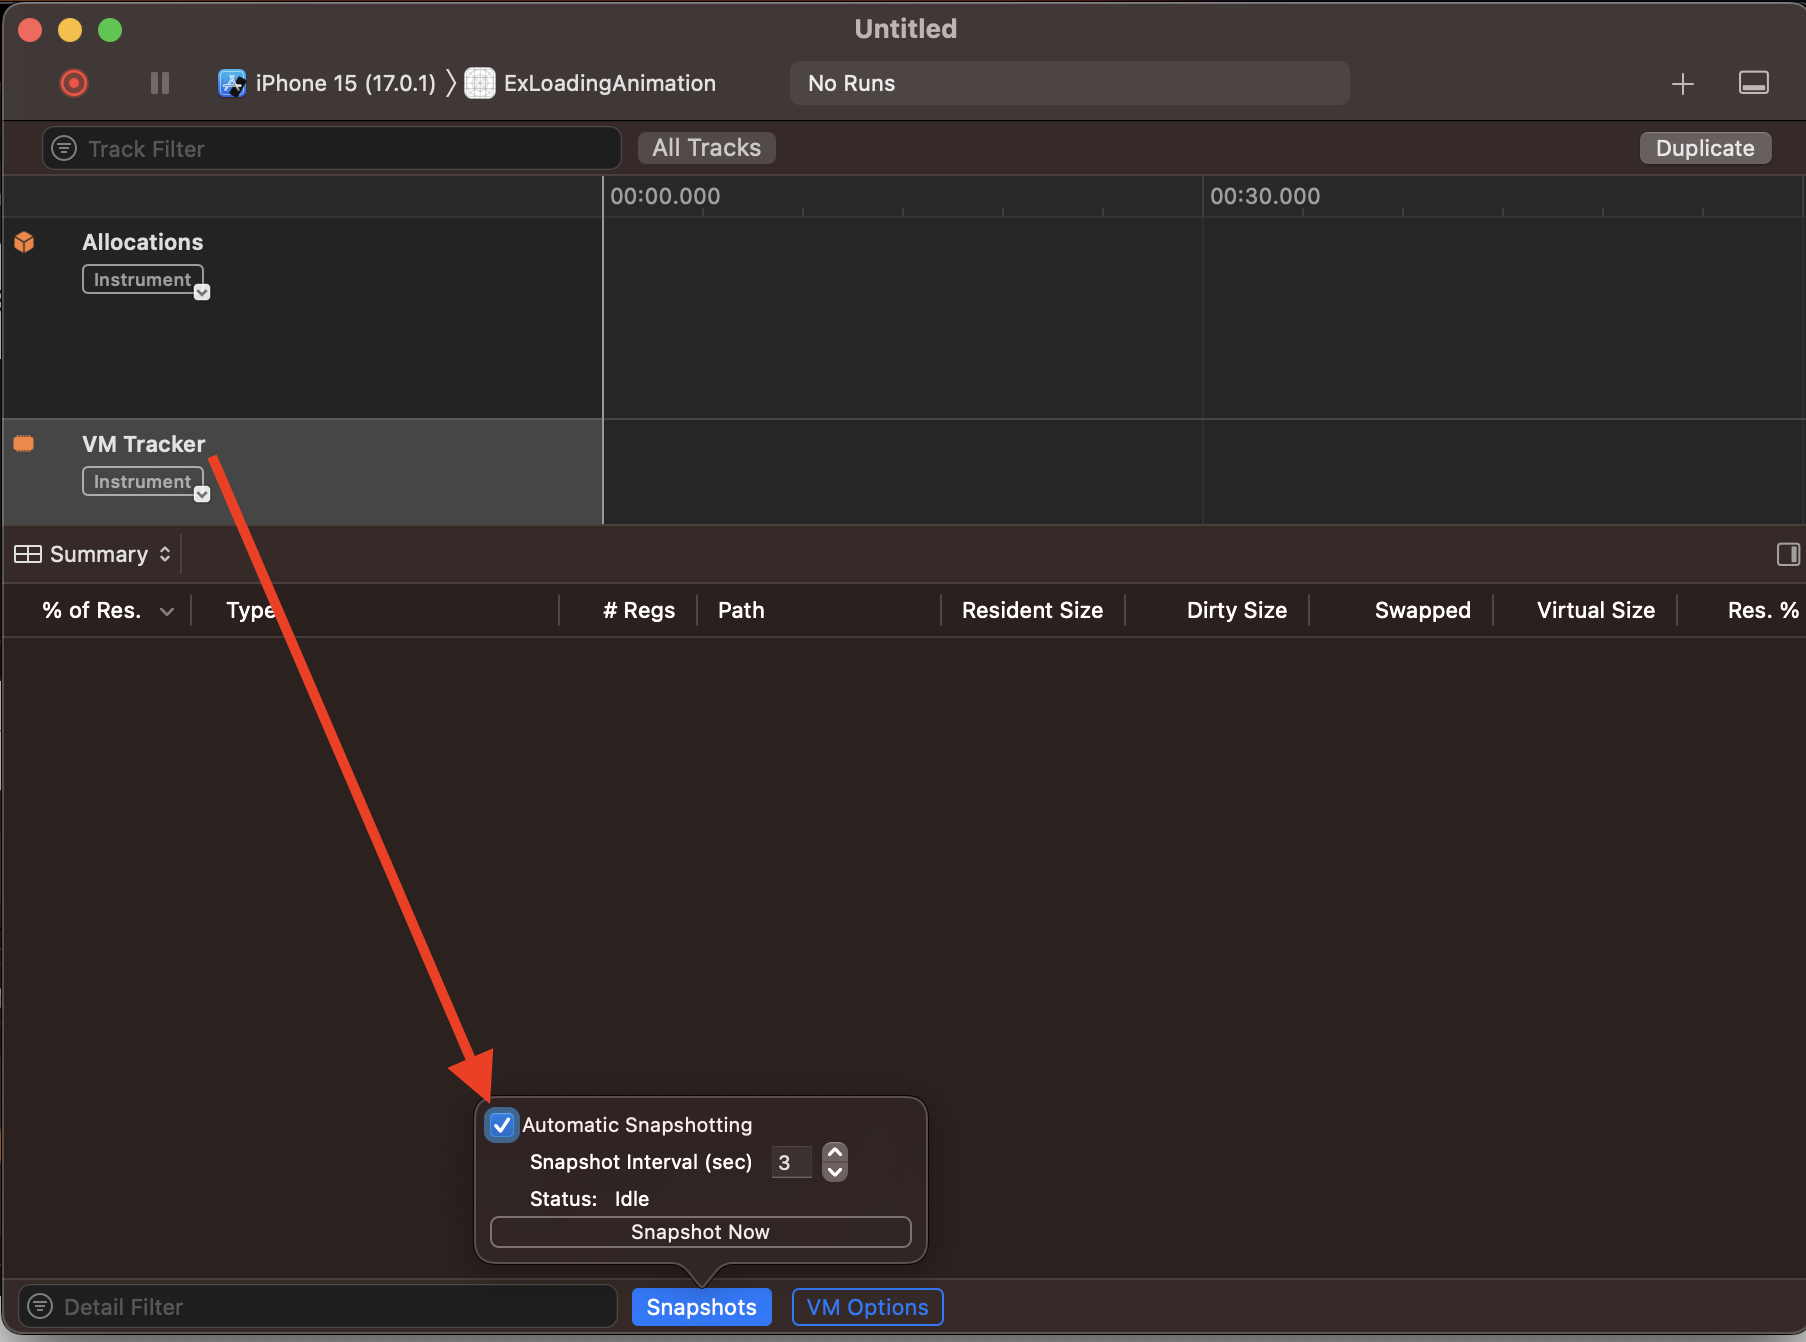
- 왼쪽 탭에서 VM Tracker를 누른 후, Snpashots 버튼 클릭 > Automatic Snapshotting 옵션 체크하여 활성화
- VM Tracker는 Allocations의 보조 수단이므로, Allocations이 진행될때 snapshot을 3초마다 반복하여 확인해주는 작업때문에 이 옵션으로 사용

- 준비 완료되었고, 이제 빨간색 녹화 버튼을 누른 후 확인이 가능

'iOS 응용 (swift)' 카테고리의 다른 글
Comments


