
- 분류 전체보기 (1719)

- Git, CocoaPods, Xcode, Shel.. (71)
- iOS 튜토리얼 (SwiftUI) (23)
- iOS 기본 (SwiftUI) (55)
- iOS 응용 (SwiftUI) (75)
- iOS 접근성 (SwiftUI) (3)
- iOS Combine (SwiftUI) (19)
- swift 5 문법 (23)
- swift 공식 문서 (27)
- iOS 기본 (swift) (149)
- iOS 실전 (swift) (51)
- iOS 응용 (swift) (740)
- iOS framework (33)
- RxSwift (40)
- OAuth Login (4)
- Architecture (swift) (34)
- CoreML (2)
- REST API (2)
- iOS 앱 배포와 출시 (29)
- Unit Test와 UI Test (5)
- Design Pattern (디자인 패턴) (4)
- Clean Architecture (22)
- Clean Code (클린 코드) (15)
- Refactoring (리펙토링) (61)
- 알고리즘 (8)
- 커스텀 프레임워크 (2)
- Mac OS 편의 설정 (6)
- HIG(Human Interface Guideli.. (70)
- UI 컴포넌트 (swift) (66)
- 빌드 환경 설정 (4)
- Swift-Extension (0)
- WWDC 정리 (32)
- 오픈소스 까보기 (5)
- Swift Macro (6)
- 최적화하기 (6)
- AI (22)
Notice
Recent Posts
Recent Comments
Link
| 일 | 월 | 화 | 수 | 목 | 금 | 토 |
|---|---|---|---|---|---|---|
| 1 | 2 | 3 | 4 | |||
| 5 | 6 | 7 | 8 | 9 | 10 | 11 |
| 12 | 13 | 14 | 15 | 16 | 17 | 18 |
| 19 | 20 | 21 | 22 | 23 | 24 | 25 |
| 26 | 27 | 28 | 29 | 30 | 31 |
Tags
- MVVM
- 클린 코드
- Xcode
- map
- 스위프트
- Observable
- Refactoring
- 클로드코드
- Human interface guide
- 애니메이션
- Protocol
- rxswift
- UITextView
- combine
- clean architecture
- uitableview
- claude code
- swift documentation
- SWIFT
- swiftUI
- 리팩토링
- tableView
- 리펙토링
- ios
- HIG
- collectionview
- uiscrollview
- RxCocoa
- Clean Code
- UICollectionView
Archives
- Today
- Total
김종권의 iOS 앱 개발 알아가기
[iOS - SwiftUI] 그라데이션 넣는 방법 (Linear Gradation) 본문

그라데이션 넣는 방법
- SwiftUI의 LinearGradient를 사용하여 그라데이션 적용
- LienearGradient는 단어 그대로 선형적인 그라데이션이며, 3가지의 init이 존재
@available(iOS 13.0, macOS 10.15, tvOS 13.0, watchOS 6.0, *)
@frozen public struct LinearGradient : ShapeStyle, View, Sendable {
    public init(gradient: Gradient, startPoint: UnitPoint, endPoint: UnitPoint)
    public init(colors: [Color], startPoint: UnitPoint, endPoint: UnitPoint)
    public init(stops: [Gradient.Stop], startPoint: UnitPoint, endPoint: UnitPoint)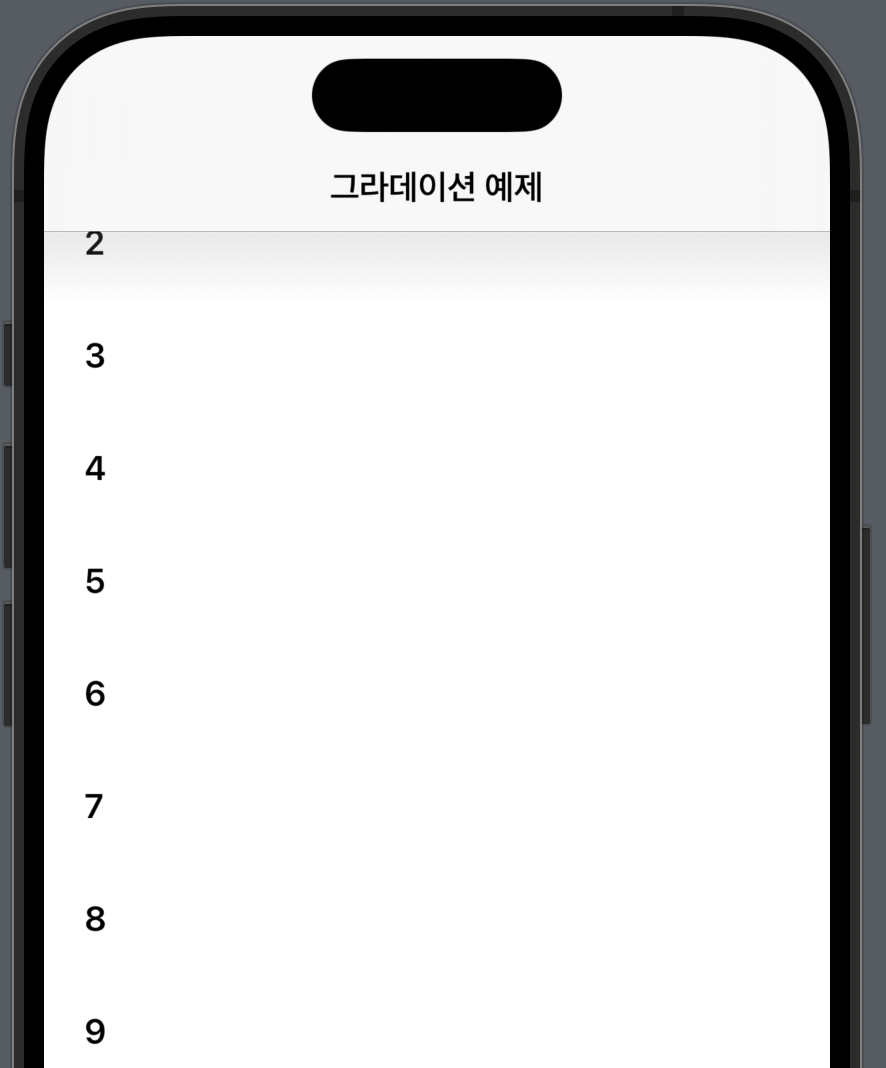
}- 이 LinearGradient를 만약 아래 사진처럼 상단에 넣고 싶다면 ZStack을 활용 코딩
ZStack {
    ScrollView {
    }

    VStack {
    	LienearGradient()
        Spacer() // Gradient를 상단에 배치하기 위함
    }
}- LinearGradient의 3가지 init중에 색상이 일정한 비율로 변하는 그라데이션이 필요하므로 LinearGradient(gradient:startPoint:)를 사용
- (초기화 방법에 대해서는 아래에서 계속)
LinearGradient(
  gradient: Gradient(colors: [.gray.opacity(0.2), .clear]),
  startPoint: .top, endPoint: .bottom
)- 아래처럼 작성하면 구현 완료
struct ContentView: View {
    var array = (1...100).map(String.init)

    var body: some View {
        ZStack {
            ScrollView {
                Spacer(minLength: 36)

                LazyVStack(alignment: .leading, spacing: 36) {
                    ForEach(array, id: \.self) { item in
                        row(item)
                    }
                    .padding(.horizontal, 20)
                }

                Spacer(minLength: 32)
            }

            VStack(spacing: 0) {
                Divider()
                    .frame(height: 0.5)

                LinearGradient(
                    gradient: Gradient(colors: [.gray.opacity(0.2), .clear]),
                    startPoint: .top, endPoint: .bottom
                )
                .frame(height: 36)

                Spacer()
            }
        }
        .navigationTitle("그라데이션 예제")
    }

    func row(_ item: String) -> some View {
        HStack {
            Text(item)
                .font(.headline)
        }
    }
}
참고) LienearGradient 초기화 3가지 방법
- LinearGradient(gradient:startPoint:): 색상이 일정한 비율로 변해야 할 때 적합
LinearGradient(
  gradient: Gradient(colors: [.gray.opacity(0.2), .clear]),
  startPoint: .top, endPoint: .bottom
)- LinearGradient(colors:startPoint:endPoint:): 여러 색상을 넣고 싶은 경우 사용
LinearGradient(
    colors: [.yellow, .green, .blue],
    startPoint: .leading,
    endPoint: .trailing
)- LinearGradient(stops:startPoint:endPoint:): 특정 위치에 특정 색상을 지정하고 싶을 때 사용
LinearGradient(
    stops: [
        Gradient.Stop(color: .pink, location: 0.0),
        Gradient.Stop(color: .purple, location: 0.5),
        Gradient.Stop(color: .black, location: 1.0)
    ],
    startPoint: .topLeading,
    endPoint: .bottomTrailing
)'iOS 응용 (SwiftUI)' 카테고리의 다른 글
| [iOS - SwiftUI] 뷰 주입받는 방법 (Generics, AnyView) (0) | 2025.03.12 |
|---|---|
| [iOS - SwiftUI] Spacer(minLength:)를 사용할때 주의할 점 (0) | 2025.03.05 |
| [iOS - SwiftUI] 뷰에서 if, else 구분해야할때 id 활용하는 방법 (SwiftUI의 id) (0) | 2025.02.19 |
| [iOS - SwiftUI] 키보드 높이 구하는 방법 (#combine) (0) | 2025.02.12 |
| [iOS - SwiftUI] HStack, VStack에서의 alignment 개념 (center, top, bottom, firstTextBaseline, lastTextBaseline) (0) | 2025.01.28 |
'iOS 응용 (SwiftUI)' Related Articles
more


Comments