Notice
Recent Posts
Recent Comments
Link
| 일 | 월 | 화 | 수 | 목 | 금 | 토 |
|---|---|---|---|---|---|---|
| 1 | 2 | 3 | 4 | 5 | 6 | 7 |
| 8 | 9 | 10 | 11 | 12 | 13 | 14 |
| 15 | 16 | 17 | 18 | 19 | 20 | 21 |
| 22 | 23 | 24 | 25 | 26 | 27 | 28 |
Tags
- 리펙토링
- UICollectionView
- uiscrollview
- Observable
- UITextView
- Xcode
- scrollview
- swiftUI
- tableView
- combine
- Protocol
- map
- ribs
- ios
- swift documentation
- Refactoring
- 클린 코드
- clean architecture
- uitableview
- 리팩토링
- SWIFT
- MVVM
- 애니메이션
- rxswift
- 스위프트
- Clean Code
- HIG
- RxCocoa
- collectionview
- Human interface guide
Archives
- Today
- Total
김종권의 iOS 앱 개발 알아가기
[iOS - swift] cornerCurve 개념 (CornerRadius, round button, iOS 13+) 본문
iOS 응용 (swift)
[iOS - swift] cornerCurve 개념 (CornerRadius, round button, iOS 13+)
jake-kim 2022. 2. 27. 19:36cornerCurve 개념
- CALayer에 프로퍼티로 존재하는 cornerCurve

- 해당 프로피티를 이용하면 조금 더 cornerRadius를 설정했을때 더욱 자연스럽게 표현이 가능
button.layer.cornerRadius = 50
button.layer.cornerCurve = .continuous
ex) 회색 버튼이 .continuous 적용


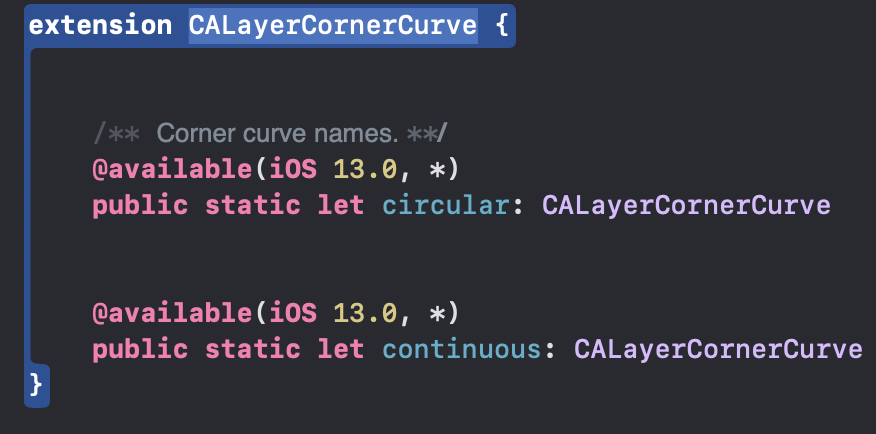
- cornerCurve에는 두 가지 속성이 존재
- .circular: 원에 가까운 radius 처리
- .continuous: 매끄럽고 자연스럽게 처리 (보통 이 속성 사용)

* 전체 코드
(편리한 오토레이아웃 작성을 위해 SnapKit 프레임워크 사용)
import UIKit
import SnapKit

class ViewController: UIViewController {
  private let normalButton: UIButton = {
    let b = UIButton()
    b.setTitle("버튼", for: .normal)
    b.setTitleColor(.white, for: .normal)
    b.setTitleColor(.blue, for: .highlighted)
    b.layer.cornerRadius = 40
    b.backgroundColor = .systemRed
    return b
  }()
  private let featureButton: UIButton = {
    let b = UIButton()
    b.setTitle("버튼", for: .normal)
    b.setTitleColor(.white, for: .normal)
    b.setTitleColor(.red, for: .highlighted)
    b.layer.cornerRadius = 40
    b.layer.cornerCurve = .continuous
    b.backgroundColor = .systemGray
    return b
  }()

  override func viewDidLoad() {
    super.viewDidLoad()
    self.view.addSubview(self.normalButton)
    self.view.addSubview(self.featureButton)

    self.normalButton.snp.makeConstraints {
      $0.top.centerX.equalToSuperview()
      $0.width.height.equalTo(120)
    }
    self.featureButton.snp.makeConstraints {
      $0.bottom.centerX.equalToSuperview()
      $0.width.height.equalTo(120)
    }
  }

  override func viewDidAppear(_ animated: Bool) {
    super.viewDidAppear(animated)
    UIView.animate(withDuration: 2) {
      self.normalButton.snp.remakeConstraints {
        $0.center.equalToSuperview()
        $0.width.height.equalTo(120)
      }
      self.featureButton.snp.remakeConstraints {
        $0.center.equalToSuperview()
        $0.width.height.equalTo(120)
      }
      self.view.layoutIfNeeded()
    }
  }
}
* 참고
https://medium.com/fueled-engineering/continuous-rounded-corners-with-uikit-b575d50ab232
'iOS 응용 (swift)' 카테고리의 다른 글
Comments


