Notice
Recent Posts
Recent Comments
Link
| 일 | 월 | 화 | 수 | 목 | 금 | 토 |
|---|---|---|---|---|---|---|
| 1 | 2 | 3 | 4 | 5 | 6 | 7 |
| 8 | 9 | 10 | 11 | 12 | 13 | 14 |
| 15 | 16 | 17 | 18 | 19 | 20 | 21 |
| 22 | 23 | 24 | 25 | 26 | 27 | 28 |
Tags
- swiftUI
- UITextView
- 리펙토링
- ribs
- combine
- 스위프트
- 리팩토링
- UICollectionView
- collectionview
- SWIFT
- Xcode
- swift documentation
- Human interface guide
- Refactoring
- 클린 코드
- scrollview
- 애니메이션
- RxCocoa
- tableView
- uitableview
- HIG
- map
- Clean Code
- ios
- rxswift
- Protocol
- clean architecture
- uiscrollview
- MVVM
- Observable
Archives
- Today
- Total
김종권의 iOS 앱 개발 알아가기
[iOS - swift] 2. Local Notification (로컬 푸시, 로컬 노티) - badge (뱃지) 숫자 처리, 딥링크 처리 본문
iOS 응용 (swift)
[iOS - swift] 2. Local Notification (로컬 푸시, 로컬 노티) - badge (뱃지) 숫자 처리, 딥링크 처리
jake-kim 2022. 5. 8. 15:231. Local Notification (로컬 푸시, 로컬 노티) - 사용 방법
2. Local Notification (로컬 푸시, 로컬 노티) - badge (뱃지) 숫자 처리, 딥링크 처리
* 1번 까지 진행한 노티 코드: https://github.com/JK0369/ExLocalPush1
Badge 숫자 처리

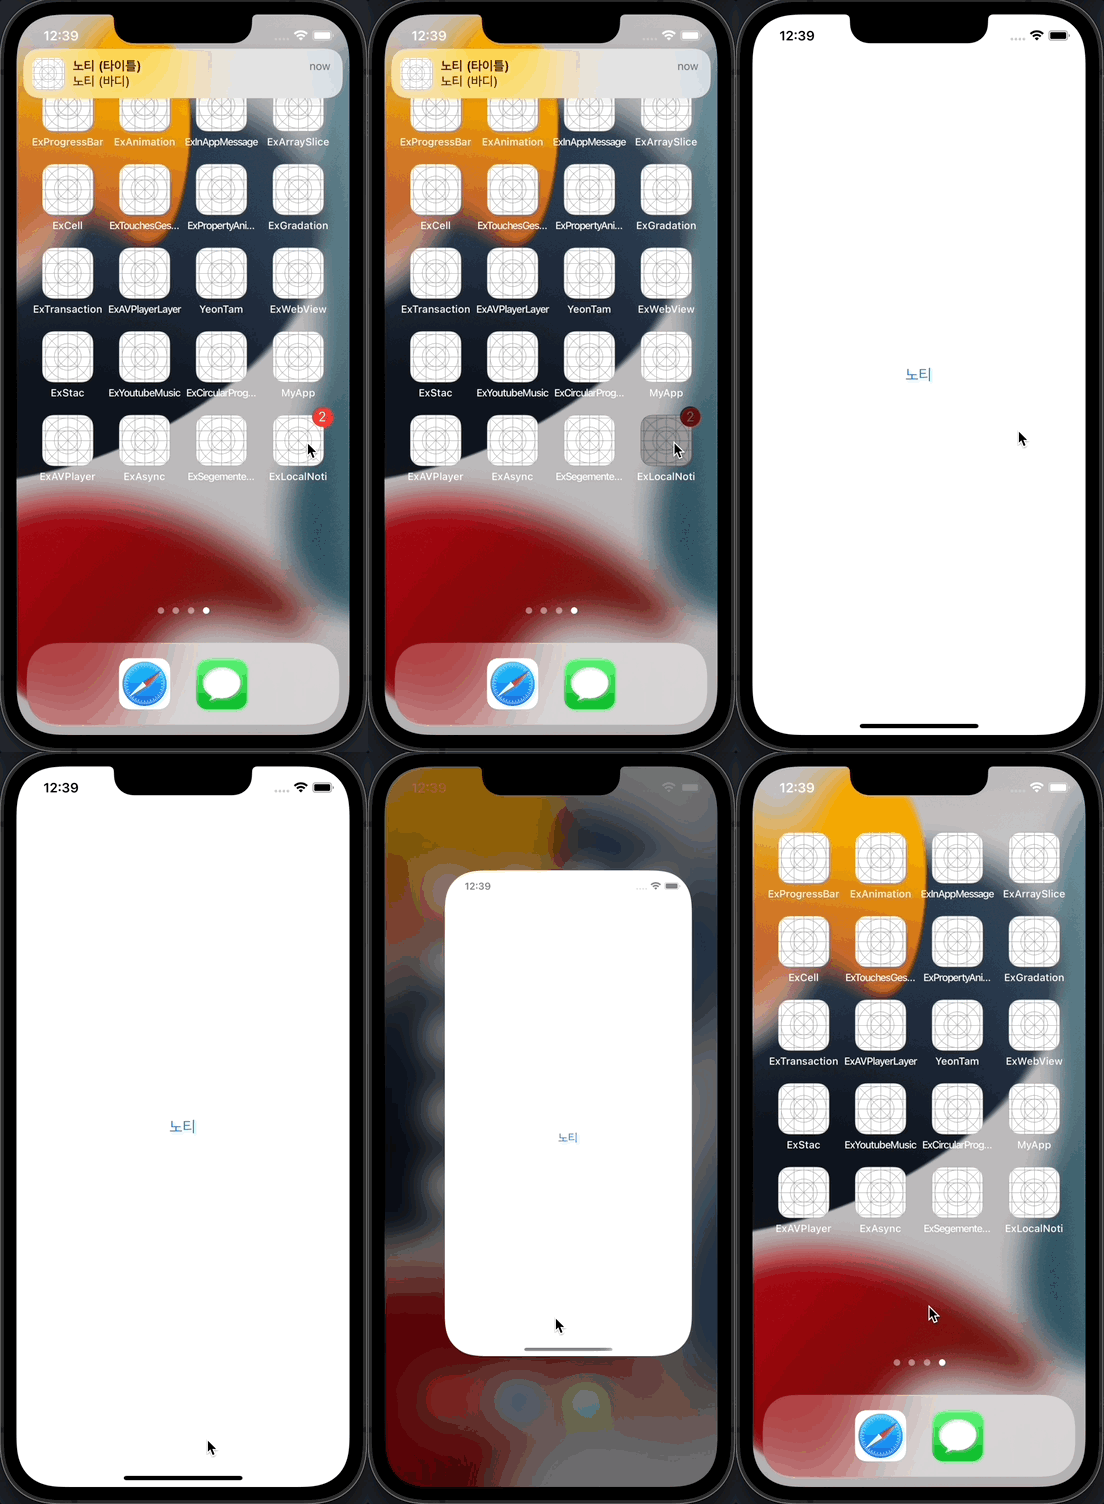
- 로컬 푸시의 뱃지는 수동으로 처리
  // iOS 13 이하나 SceneDelegate가 없는 경우
  func applicationDidBecomeActive(_ application: UIApplication) {
    UIApplication.shared.applicationIconBadgeNumber = 0
  }

  // iOS 13 이상, SceneDelegate가 존재할 때
  func sceneWillEnterForeground(_ scene: UIScene) {
    UIApplication.shared.applicationIconBadgeNumber = 0
  }
cf) 노티를 request할때도 applicationIconBadgeNumber에 접근이 가능하므로 응용 가능
content.badge = NSNumber(value: UIApplication.shared.applicationIconBadgeNumber + 1)딥링크 처리
- 딥링크 구분은 보낼때 UNNotificationRequest의 identifier로 구분
(noti request 쪽)
  // ViewController.swift
  @objc private func requestNoti() {
    let content = UNMutableNotificationContent()
    content.title = "노티 (타이틀)"
    content.body = "노티 (바디)"
    content.sound = .default
    content.badge = 2

    let request = UNNotificationRequest(
      identifier: "local noti",
      content: content,
      trigger: UNTimeIntervalNotificationTrigger(
        timeInterval: 3,
        repeats: false
      )
    )

    UNUserNotificationCenter.current()
      .add(request) { error in
        guard let error = error else { return }
        print(error.localizedDescription)
      }
}- AppDelegate의 UNUserNotificationCenterDelegate 델리게이트에서 처리
- userNotificationCenter(_:didReceive:withCompletionHandler:)에서 처리
- response가 사용자가 노티를 클릭했을때 그 노티의 정보를 가지고 있는 인스턴스
extension AppDelegate: UNUserNotificationCenterDelegate {
  func userNotificationCenter(_ center: UNUserNotificationCenter, willPresent notification: UNNotification) async -> UNNotificationPresentationOptions {
    [.list, .banner, .sound, .badge]
  }
  func userNotificationCenter(
    _ center: UNUserNotificationCenter,
    didReceive response: UNNotificationResponse,
    withCompletionHandler completionHandler: @escaping () -> Void
  ) {
    if response.notification.request.identifier == "local noti" {
      print("딥링크 수행")
    }
    completionHandler()
  }
}
딥링크 모델링
딥링크 동작) main화면으로 이동 -> 파란색 화면으로 이동 -> 파란색 화면에 딥링크로 가져온 데이터 표시
예제로 사용할 딥링크
my-app://main/first?message=deeplink-test-message&desc=test-desc
- 문자열로 오면 그 문자열을 enum 타입으로 디코딩하여 사용하면 편리

- 앱에서 사용할 URL의 구성요소는 아래와 같이 구성
- scheme: 앱 이름
- host: 특정 주소
- query parameter: 데이터 전달

- 헷갈릴 수 있는 query parameter
- 시작은 '?'이것이고, 쿼리들의 연결은 '&'로 구성
- 링크 모델 설계
- string이나 url을 받아서 LinkType으로 디코딩하여 사용
enum DeepLink {
  case login
  case main(message: String?, desc: String?)
}- 딥링크를 처리하는데 필요한 프로퍼티 정의
- host와 path를 computed property로 선언하고, enum에서의 equal을 사용할 수 있는 ~=연산자를 정의하여 host와 path가 같으면 같은 enum type이라 정의
  // in enum DeepLink
  private static var scheme = "my-app"
  private var host: String {
    switch self {
    case .login:
      return "login"
    case .main:
      return "main"
    }
  }
  private var path: String {
    switch self {
    case .login:
      return ""
    case .main:
      return "/first" // 주의: url.path값은 '/'로 시작하므로, path에도 '/'을 붙여주기
    }
  }

  static func ~= (lhs: Self, rhs: URL) -> Bool {
    lhs.host == rhs.host && lhs.path == rhs.path
}- fail initializer에서 string값을 받아서 위에서 정의한 ~= 연산자에 의하여 switch문으로 어떤 타입인지 분류
  init?(string: String) {
    guard
      let url = URL(string: string),
      let scheme = url.scheme,
      Self.scheme == scheme
    else { return nil }

    switch url {
    case .login:
      self = .login
    case .main(message: nil, desc: nil):
      self = .main(
        message: url.getQueryParameterValue(key: "message"),
        desc: url.getQueryParameterValue(key: "desc")
      )
    default:
      return nil
    }
  }

// query parameter의 value값을 구하기 위한 extension 따로 추가
extension URL {
  func getQueryParameterValue(key: String) -> String? {
    URLComponents(url: self, resolvingAgainstBaseURL: true)?
      .queryItems?
      .first(where: { $0.name == key })?
      .value
  }
}
딥링크 처리
- 처리하는 쪽은 DeepLink의 생성자에 받은 identifier를 넘겨서 nil이 아니면 특정 화면으로 이동되도록 처리
- 주의) 화면 전환은 AppDelegate에서 관리하도록해야 딥링크 화면전화에 유용
extension AppDelegate: UNUserNotificationCenterDelegate {
  func userNotificationCenter(_ center: UNUserNotificationCenter, willPresent notification: UNNotification) async -> UNNotificationPresentationOptions {
    [.list, .banner, .sound, .badge]
  }
  func userNotificationCenter(
    _ center: UNUserNotificationCenter,
    didReceive response: UNNotificationResponse,
    withCompletionHandler completionHandler: @escaping () -> Void
  ) {
    guard let deepLink = DeepLink(string: response.notification.request.identifier) else { return }
    switch deepLink {
    case .login:
      self.presentLogin()
    case let .main(message, desc):
      self.presentMain(message: message, desc: desc)
    }
    completionHandler()
  }
}

// MARK: AppDelegate + Flow
extension AppDelegate {
  func presentLogin() {
    let vc = ViewController()
    self.window?.rootViewController = vc
    vc.view.layoutIfNeeded()
  }
  func presentMain(message: String?, desc: String?) {
    let vc = MainVC(message: message, desc: desc)
    self.window?.rootViewController = vc
    vc.view.layoutIfNeeded()
  }
}- 딥링크에 의하여 AppDelegate에서 presentMain에 의하여 MainVC화면으로 이동
- MainVC와 같이 message와 desc가 존재하면 (= 딥링크를 받은 경우) MainFirstVC를 띄우도록 구현
override func viewDidAppear(_ animated: Bool) {
  super.viewDidAppear(animated)

  guard
    let message = self.message,
    let desc = self.desc
  else { return }

  DispatchQueue.main.asyncAfter(deadline: .now() + 1.5) {
    let vc = MainFirstVC(message: message, desc: desc)
    self.present(vc, animated: true)
  }
}
* 전체 코드: https://github.com/JK0369/ExLocalPush2
* 참고
https://developer.apple.com/documentation/uikit/uiapplication/1622918-applicationiconbadgenumber
'iOS 응용 (swift)' 카테고리의 다른 글
Comments


