Notice
Recent Posts
Recent Comments
Link
| 일 | 월 | 화 | 수 | 목 | 금 | 토 |
|---|---|---|---|---|---|---|
| 1 | 2 | 3 | 4 | 5 | 6 | 7 |
| 8 | 9 | 10 | 11 | 12 | 13 | 14 |
| 15 | 16 | 17 | 18 | 19 | 20 | 21 |
| 22 | 23 | 24 | 25 | 26 | 27 | 28 |
Tags
- swiftUI
- scrollview
- ios
- Observable
- 스위프트
- SWIFT
- clean architecture
- 리펙토링
- Protocol
- rxswift
- 애니메이션
- Refactoring
- Human interface guide
- HIG
- map
- 리팩토링
- Clean Code
- collectionview
- UICollectionView
- tableView
- uiscrollview
- Xcode
- 클린 코드
- MVVM
- swift documentation
- RxCocoa
- uitableview
- ribs
- UITextView
- combine
Archives
- Today
- Total
김종권의 iOS 앱 개발 알아가기
[iOS - SwiftUI] LocalizedStringKey, Localization 지역화 방법 본문
iOS 기본 (SwiftUI)
[iOS - SwiftUI] LocalizedStringKey, Localization 지역화 방법
jake-kim 2022. 11. 4. 23:45지역화
- 기존에 Swift에서 지역화 처리 방법
- Localizable.strings 파일을 만든 후 (key-value) 로 스트링 값을 입력
- NSLocalizedKey를 사용하고 위 key에 접근하여 사용
UILabel(string: NSLocalizedString(key: "myKey"))- SwiftUI에서 지역화 처리 방법
- Localizable.strings 파일을 만든 후 (key-value)로 스트링 값을 입력
- .environment(_:_:)을 이용하여 지역화
.environment(\.locale, .init(identifier: "en"))Localization 파일 준비
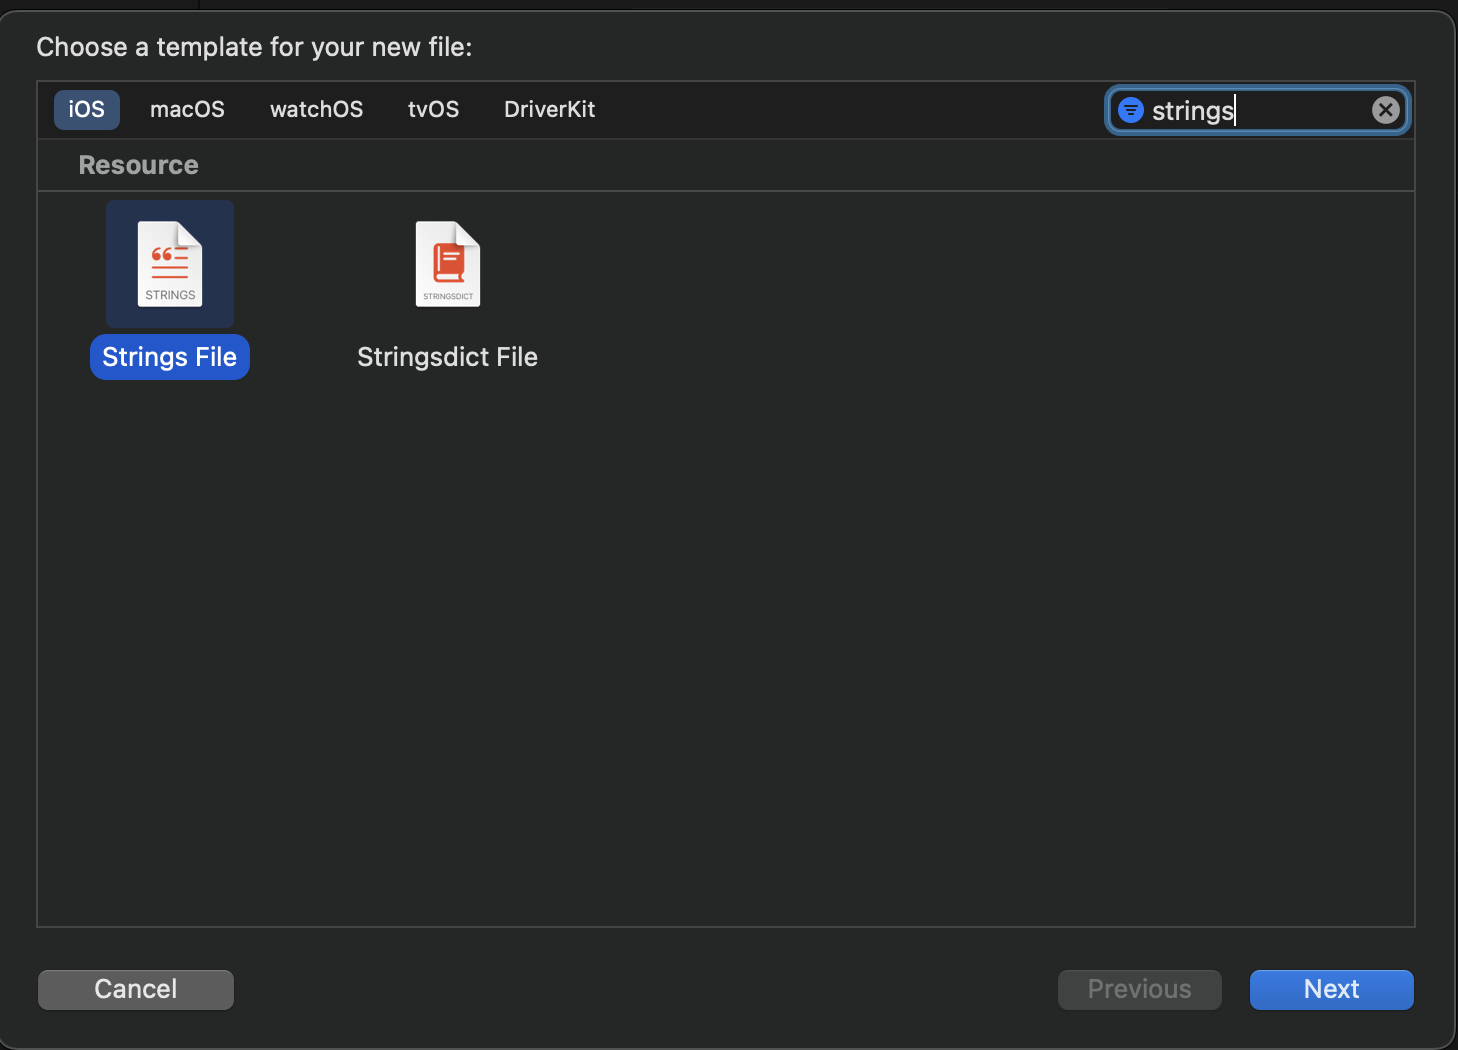
- Localized.strings 파일 생성
- String File 선택

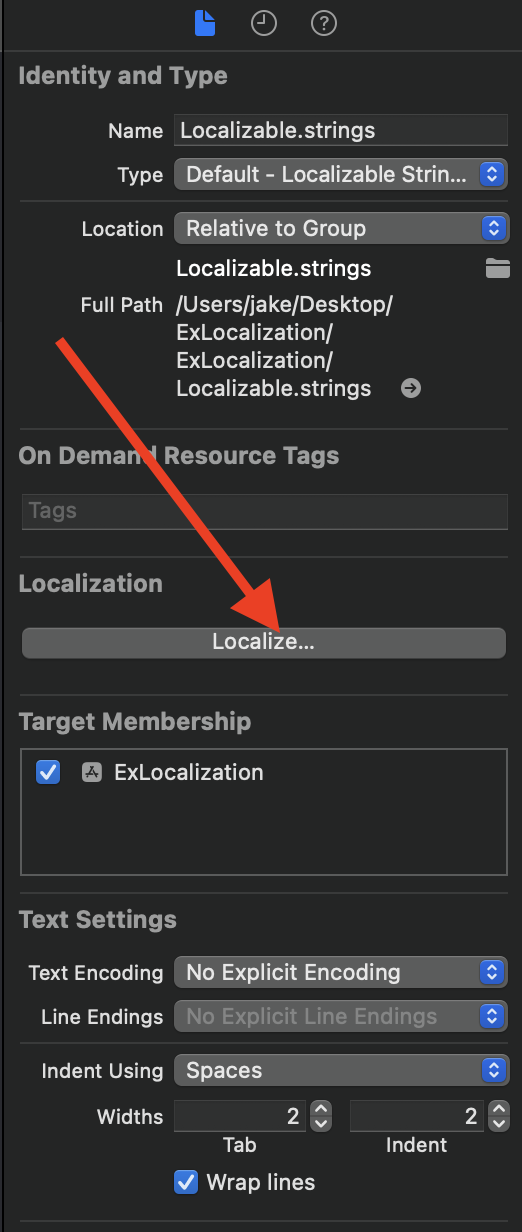
- Localizable.strings 이름으로하고 저장

- Localize... 버튼 클릭

- Project > Info > Localization 옵션에서 다른 언어들을 추가
- 현재 Base, English만 있지만 + 버튼을 눌러서 korean도 추가

- Localizable 하위에 Korean도 추가된 것을 확인

- English, Korean에 각각 key - value 문자열값 정의
"confirm" = "confirm";"confirm" = "확인";Localizable 적용
- .environment(\.locale, .init(identifier:)) 사용하여 적용
struct ContentView: View {
  var body: some View {
    Text("confirm")
      .environment(\.locale, .init(identifier: "en"))
  }
}
'iOS 기본 (SwiftUI)' 카테고리의 다른 글
Comments


