
| 일 | 월 | 화 | 수 | 목 | 금 | 토 |
|---|---|---|---|---|---|---|
| 1 | ||||||
| 2 | 3 | 4 | 5 | 6 | 7 | 8 |
| 9 | 10 | 11 | 12 | 13 | 14 | 15 |
| 16 | 17 | 18 | 19 | 20 | 21 | 22 |
| 23 | 24 | 25 | 26 | 27 | 28 |
- MVVM
- 애니메이션
- 리펙토링
- RxCocoa
- tableView
- Refactoring
- uiscrollview
- rxswift
- 클린 코드
- Protocol
- combine
- 리팩토링
- Observable
- clean architecture
- 리펙터링
- Xcode
- Human interface guide
- HIG
- SWIFT
- UITextView
- UICollectionView
- uitableview
- ios
- collectionview
- ribs
- swift documentation
- map
- Clean Code
- 스위프트
- swiftUI
- Today
- Total
김종권의 iOS 앱 개발 알아가기
[iOS - UI Custom] 15. PickerView(피커 뷰) (programmatically) 본문
[iOS - UI Custom] 15. PickerView(피커 뷰) (programmatically)
jake-kim 2020. 5. 4. 15:17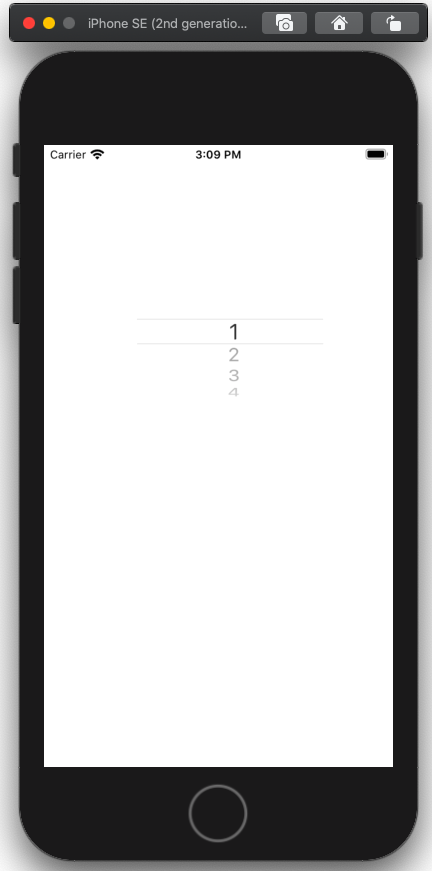
* picker view는 table view와 인터페이스가 유사
| Table View | Picker View |
| numberOfSections(in:) | numberOfComponents(in:) |
| tableView(_:numberOfRowsInSection:) | pickerView(_:numberofRowsInComponent:) |
| tableView(_:cellForRowAt:) | pickerView(_:titleForRow:forComponent:) |
| tableView(_:didSelectRowAt:) | pickerView(_:didSelectRow:inComponent:) |
| UITableViewDelegate | UIPickerViewDelegate |
| UITableViewDataSource | UIPickerViewDataSource |
1. Picker View 생성
8번 라인
|
1
2
3
4
5
6
7
8
9
10
11
12
13
14
|
// ViewController.swift
var myPicker: UIPickerView!
var list = ["1", "2", "3", "4"]
override func viewDidLoad() {
super.viewDidLoad()
myPicker = UIPickerView()
myPicker.frame = CGRect(x: 100, y: 100, width: 200, height: 200)
view.addSubview(myPicker)
myPicker.delegate = self
myPicker.dataSource = self
}
|
* delegate와 dataSource는 각 프로토콜 구현
2. Delegate, DataSource 구현
- numberOfComponents : 한 뷰에 picker view가 몇 개 담겨져 있는지 반환(여러 picker뷰가 존재하면 가로로 정렬)
나머지 메소드들은 table view와 동일
|
1
2
3
4
5
6
7
8
9
10
11
12
13
14
15
16
17
|
extension ViewController : UIPickerViewDelegate, UIPickerViewDataSource{
func. numberOfComponents(in pickerView: UIPickerView) -> Int {
return 1
}
func pickerView(_ pickerView: UIPickerView, numberOfRowsInComponent component: Int) -> Int {
return list.count
}
func pickerView(_ pickerView: UIPickerView, titleForRow row: Int, forComponent component: Int) -> String? {
return list[row]
}
func pickerView(_ pickerView: UIPickerView, didSelectRow row: Int, inComponent component: Int) {
print("select=\(row)")
}
}
|
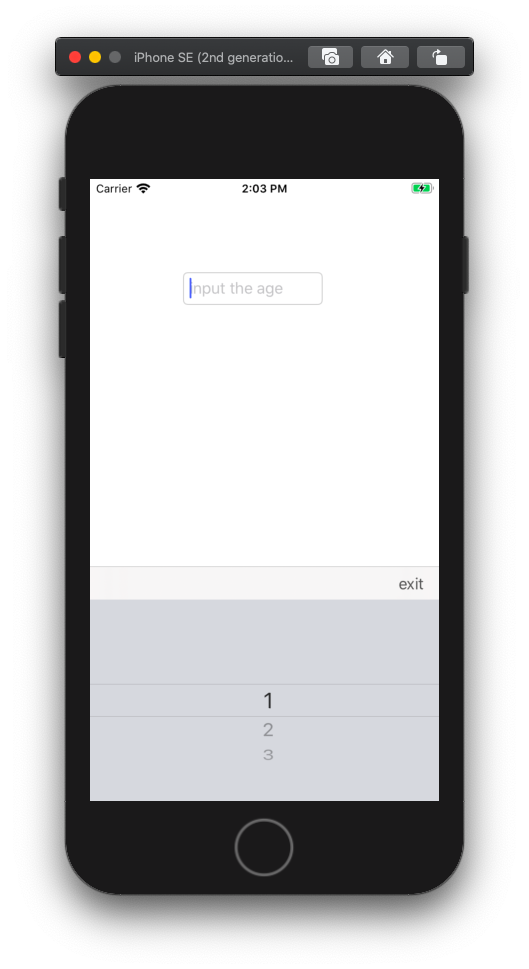
3. TextField에 등록
- text field를 클릭하면 picker에서 선택하게끔 하는 방법
- UIToolbar와 UIBarButtonItem이용
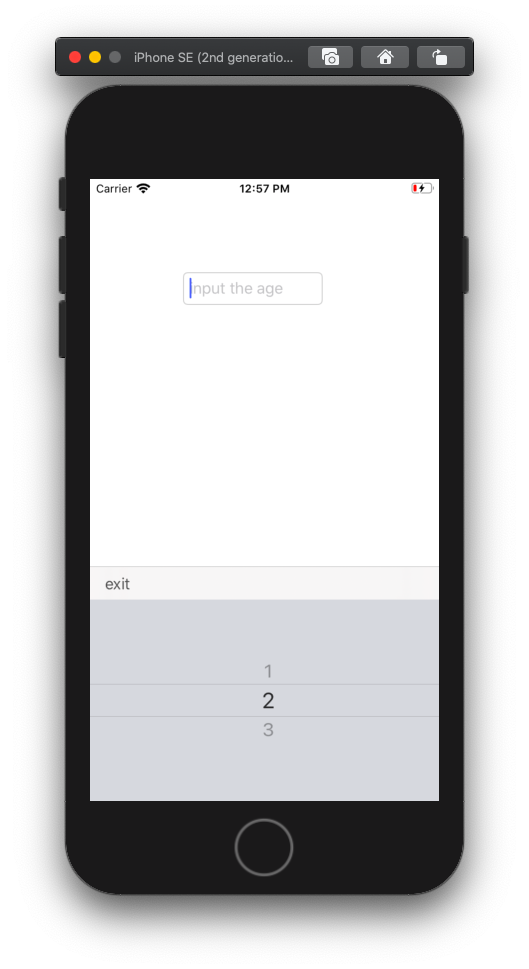
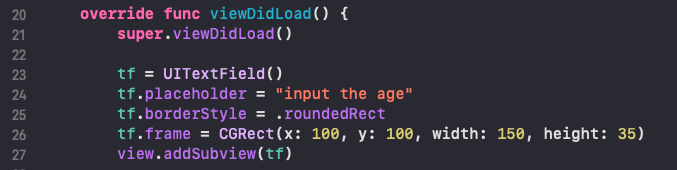
1) Textfield 준비
2) Textfield에 picker 등록 32번라인
- picker를 등록하면 자동으로 화면 하단에 생성

3) Toolbar에 들어갈 버튼 준비
- picker창을 닫을 버튼 액션 추가


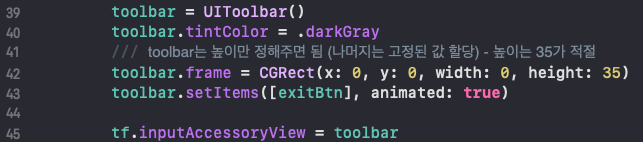
4) Toolbar생성 후 버튼 등록
- Toolbar에 버튼 등록 picker.setItems, 43번라인
- 텍스트필드.inputAccessoryView, 45번라인
- toolbar의 frame은 높이만 정해주면 나머지는 자동 할당(높이는 35가 적절한 수치)
5) UIToolbar에서의 Button위치 조정
.FlexibleSpace형태의 버튼객체를 toolbar에 추가
|
1
2
|
let flexSpace = UIBarButtonItem(barButtonSystemItem: .flexibleSpace, target: nil, action: nil)
toolbar.setItems([flexSpace, exitBtn], animated: true)
|
*full code
|
1
2
3
4
5
6
7
8
9
10
11
12
13
14
15
16
17
18
19
20
21
22
23
24
25
26
27
28
29
30
31
32
33
34
35
36
37
38
39
40
41
42
43
44
45
46
47
48
49
50
51
52
53
54
55
56
57
58
59
60
61
62
63
64
|
import UIKit
class ViewController: UIViewController {
var list = ["1", "2", "3"]
var tf: UITextField!
var toolbar: UIToolbar!
var exitBtn: UIBarButtonItem!
var picker: UIPickerView!
override func viewDidLoad() {
super.viewDidLoad()
tf = UITextField()
tf.placeholder = "input the age"
tf.borderStyle = .roundedRect
tf.frame = CGRect(x: 100, y: 100, width: 150, height: 35)
view.addSubview(tf)
picker = UIPickerView()
picker.delegate = self
/// 텍스트필드에 뷰를 등록하면, picker는 자동으로 화면 하단에 나타남
tf.inputView = picker
exitBtn = UIBarButtonItem()
exitBtn.title = "exit"
exitBtn.target = self
exitBtn.action = #selector(pickerExit)
toolbar = UIToolbar()
toolbar.tintColor = .darkGray
/// toolbar는 높이만 정해주면 됨 (나머지는 고정된 값 할당) - 높이는 35가 적절
toolbar.frame = CGRect(x: 0, y: 0, width: 0, height: 35)
toolbar.setItems([exitBtn], animated: true)
tf.inputAccessoryView = toolbar
}
@objc func pickerExit() {
/// picker와 같은 뷰를 닫는 함수
self.view.endEditing(true)
}
}
extension ViewController: UIPickerViewDelegate, UIPickerViewDataSource {
func numberOfComponents(in pickerView: UIPickerView) -> Int {
return 1
}
func pickerView(_ pickerView: UIPickerView, titleForRow row: Int, forComponent component: Int) -> String? {
return list[row]
}
func pickerView(_ pickerView: UIPickerView, numberOfRowsInComponent component: Int) -> Int {
return list.count
}
func pickerView(_ pickerView: UIPickerView, didSelectRow row: Int, inComponent component: Int) {
print(list[row])
}
}
|
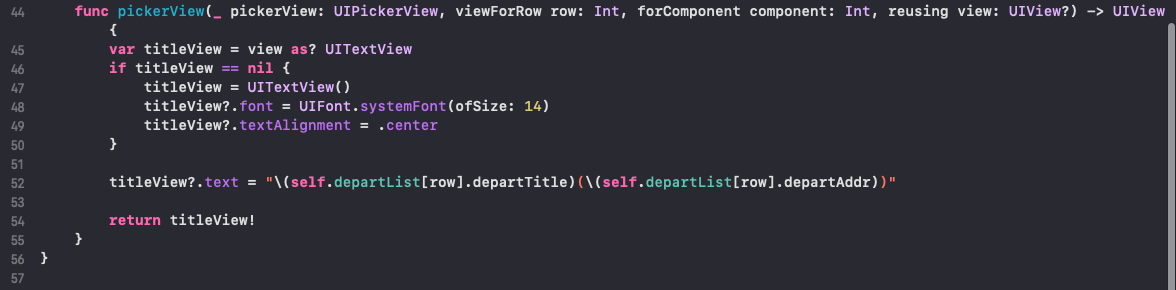
cf) pickerView(_:titleForRow:forComponent)대신에, pickerView(_:viewForRow:forComponent)사용 가능
- pickerView에서 정해진 문자 크기 뿐만이 아니라 정교하게 커스터마이징 할 수 있음
* PickerView와 유사한 Table View 내용 참고
https://ios-development.tistory.com/71
[iOS - UI Custom] 12. table view (programmatically)
* table view를 custom 한다는 것 <=> UITableViewCell을 상속받아서 custom 1. UITalbeCell을 상속받아서 custom - contentView.addSubview(객체)로 추가, autolayout 설정, 56~57 라인 2. UITableView객체 생..
ios-development.tistory.com
'iOS 실전 (swift) > UI 커스텀(프로그래밍적 접근)' 카테고리의 다른 글
| [iOS - UI Custom] 16. TapGuestureRecognizer(탭 제스쳐) (programmatically) (0) | 2020.05.05 |
|---|---|
| [iOS - UI Custom] 14. slide-out bar (side bar)만들기 (CGAffineTransform사용) (2) | 2020.05.01 |
| [iOS - UI Custom] 13. storyboard제거하여 SceneDelegate에 코딩하기 (0) | 2020.04.30 |
| [iOS - UI Custom] 12. table view (programmatically) (0) | 2020.04.30 |
| [iOS - UI Custom] 11. Auto layout (programmatically) (0) | 2020.04.26 |


