Notice
Recent Posts
Recent Comments
Link
| 일 | 월 | 화 | 수 | 목 | 금 | 토 |
|---|---|---|---|---|---|---|
| 1 | 2 | 3 | 4 | 5 | 6 | 7 |
| 8 | 9 | 10 | 11 | 12 | 13 | 14 |
| 15 | 16 | 17 | 18 | 19 | 20 | 21 |
| 22 | 23 | 24 | 25 | 26 | 27 | 28 |
Tags
- Xcode
- combine
- ribs
- Refactoring
- 클린 코드
- clean architecture
- UICollectionView
- swiftUI
- uiscrollview
- 애니메이션
- 스위프트
- 리펙토링
- scrollview
- map
- Clean Code
- rxswift
- UITextView
- RxCocoa
- Protocol
- ios
- HIG
- swift documentation
- SWIFT
- 리팩토링
- tableView
- MVVM
- Human interface guide
- uitableview
- collectionview
- Observable
Archives
- Today
- Total
김종권의 iOS 앱 개발 알아가기
[iOS - swift] 3. FlexLayout과 PinLayout 사용 방법 - 특정 뷰(Cell, scrollView), 기타(grow, shrink) 본문
iOS 응용 (swift)
[iOS - swift] 3. FlexLayout과 PinLayout 사용 방법 - 특정 뷰(Cell, scrollView), 기타(grow, shrink)
jake-kim 2023. 3. 9. 23:261. FlexLayout과 PinLayout 사용 방법 - UIStackView 개선, 속도 향상, 기능 추가, 선언형
2. FlexLayout과 PinLayout 사용 방법 - 여백(margin, padding), 정렬(alignItems, justifyContent)
3. FlexLayout과 PinLayout 사용 방법 - 특정 뷰(Cell, scrollView), 기타(grow, shrink)
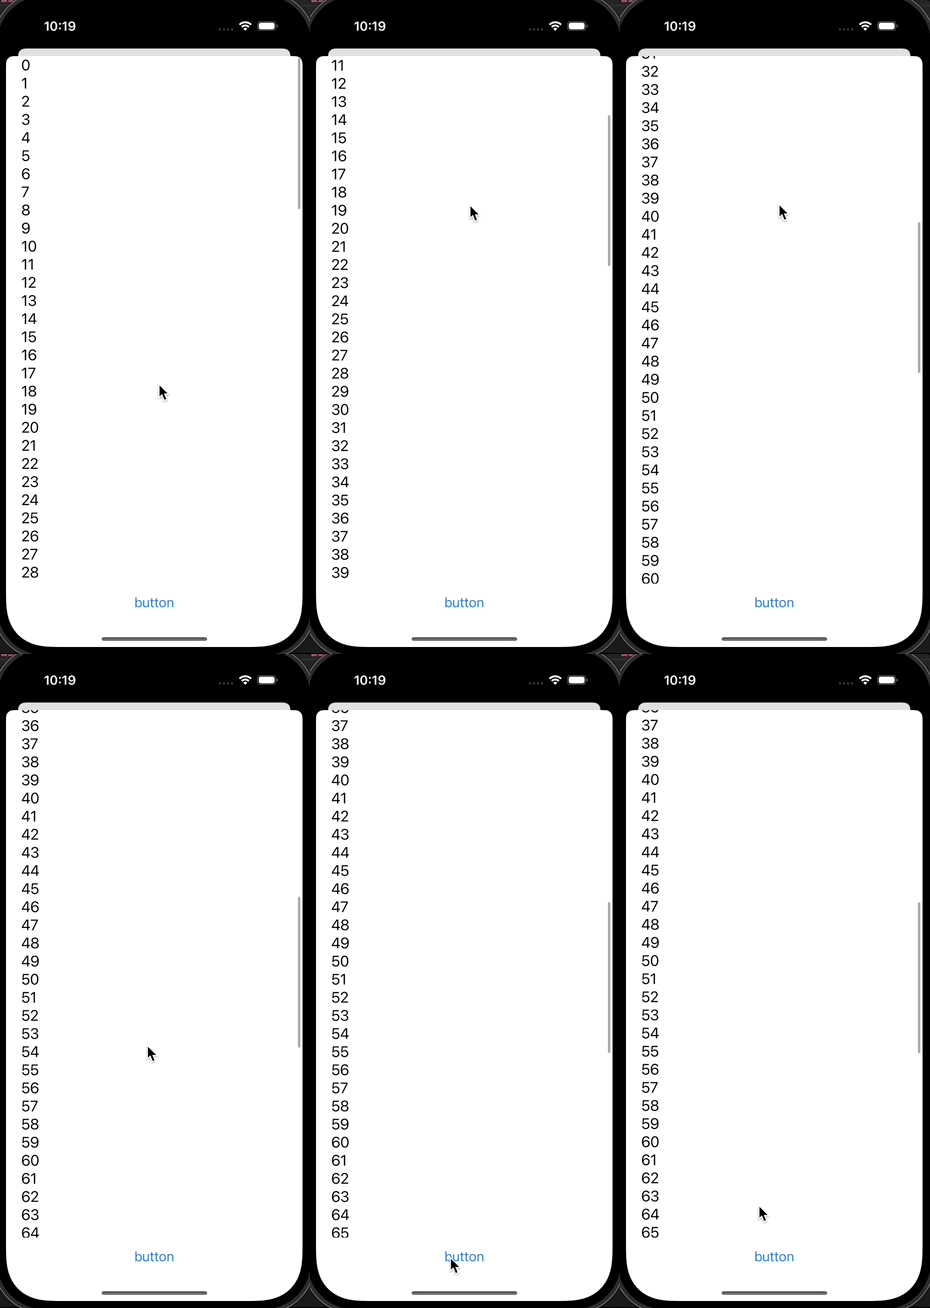
scrollView에 적용 방법
- 1. 뷰 준비 - container, scrollView, contentView
- scrollView안에 들어갈 뷰는 내부적으로 contentSize 크기에 따라 스크롤이 결정되는 UIScrollView + UIStackView처럼 구현 (이 구현 방법은 이전 포스팅 글 참고)
- 3가지에다가 밑에 버튼이 있는 케이스도 추가하기 위해 button도 준비
final class VC3: UIViewController {
    // 1.
    private let container = UIView()
    private let scrollView = UIScrollView()
    private let contentView = UIView()
    private let button: UIButton = {
        let button = UIButton()
        button.setTitle("button", for: .normal)
        button.setTitleColor(.systemBlue, for: .normal)
        button.setTitleColor(.blue, for: .highlighted)
        return button
}()- 2. addSubview
- container안에 scrollView와 button이 있는 상태
- scrollView안에 contentView가 있는 상태 (contentView를 마치 UIStackView처럼 사용)
- 스크롤을 확인하기 위해서 contentView에 addItem으로 label 삽입
// in viewDidLoad
// 2.
view.addSubview(container)
container.addSubview(scrollView)
container.addSubview(button)
scrollView.addSubview(contentView)

contentView.flex.define { flex in
    labels.forEach { label in
        flex.addItem(label)
            .marginHorizontal(20)
    }
}- layoutSubviews에서 pin과 flex 설정
override func viewDidLayoutSubviews() {
    super.viewDidLayoutSubviews()

    // 3.
    // container 크기와 위치 설정 - pin.all()으로 잡아주기
    container.pin.all()

    // button 크기와 위치 설정 - pin으로 수평에 맞추고, bottom은 뷰의 safeArea부분에 맞추기
    button.pin.horizontally().bottom(view.pin.safeArea).height(50)

    // scrollView 크기와 위치 설정 - 아랫 부분을 button의 top부분에 맞추기
    scrollView.pin.above(of: button).top().horizontally()

    // contentView 크기와 위치 설정 - 윗 부분, 왼쪽 오른쪽 부분 설정
    contentView.pin.top().horizontally()

    // contentView 안에 들어있는 children 들의 크기를 조정하고 scrollView 크기도 수정
    contentView.flex.layout(mode: .adjustHeight)
    scrollView.contentSize = contentView.frame.size
}
shrink, grow 사용방법
- shrink는 container에 들어있는 뷰들이 container보다 커질 때, 줄이는 방법
- grow는 container에 들어있는 뷰들이 container와의 여백이 남아있을때 그 여백을 채우기 위해서 늘리는 방법
예제에 사용될 코드 준비)
final class VC4: UIViewController {
    private let container = UIView()
    private let label1: UILabel = {
        let label = UILabel()
        label.text = "label1"
        label.font = .systemFont(ofSize: 30, weight: .bold)
        label.numberOfLines = 0
        label.backgroundColor = .lightGray
        return label
    }()
    private let label2: UILabel = {
        let label = UILabel()
        label.text = "label2"
        label.font = .systemFont(ofSize: 50, weight: .bold)
        label.numberOfLines = 0
        label.backgroundColor = .systemBlue
        return label
    }()
    private let label3: UILabel = {
        let label = UILabel()
        label.text = "label3"
        label.font = .systemFont(ofSize: 70, weight: .bold)
        label.numberOfLines = 0
        label.backgroundColor = .blue
        label.textColor = .white
        return label
    }()

    override func viewDidLoad() {
        super.viewDidLoad()

        modalPresentationStyle = .fullScreen
        view.backgroundColor = .white

        view.addSubview(container)
        container.flex.direction(.row).define { flex in
            flex.addItem(label1)
            flex.addItem(label2)
            flex.addItem(label3)
        }
    }

    override func viewDidLayoutSubviews() {
        super.viewDidLayoutSubviews()

        container.pin.all()
        container.flex.layout()
    }
}
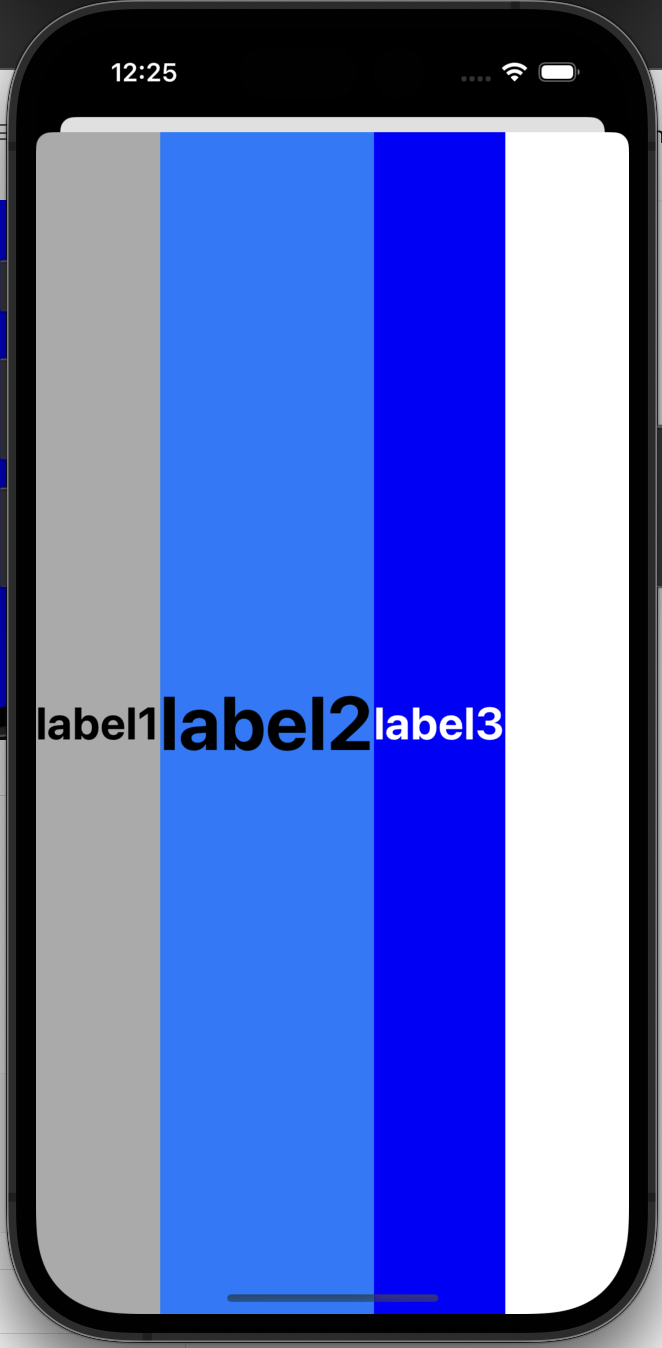
- shrink 사용 방법
- .shrink()로 값을 넣어서 사용
- 값을 넣지 않으면 0으로 적용되며, 값이 0이면 현재 크기 그대로 고정
- 안에 들어가는 값은 CGFloat형태이며, 아래와 같이 3, 1, 1로 각각 넣으면 첫 번째 뷰의 크기는 3 / (3 + 1 + 1) 비율을 현재 container의 width에 곱한 값으로 적용되는 것
- 즉, 첫 번째 뷰의 width값 = (container의 width 값) * { 3 / (3 + 1 + 1) }
- 단, content size보다 작아지지 않음
container.flex.direction(.row).define { flex in
    flex.addItem(label1)
        .shrink(3)
    flex.addItem(label2)
        .shrink(1)
    flex.addItem(label3)
        .shrink(1)
}| 적용 전 | 적용 후 |
 |
 |
- grow 사용 방법
- container의 남는 공간을 채울때 사용
(우선 label3의 width를 작게 수정)
// 테스트를 위해 label3 폰트사이즈를 작게 수정
label.font = .systemFont(ofSize: 30, weight: .bold)- grow()를 사용하여 적용
- label3에 3가중치를 두어서 구현
- label3의 width = (container의 width) * { 3 / (0 + 0 + 3) }
- 단, 다른 뷰들은 grow(0)이므로 기존 사이즈를 유지
container.flex.direction(.row).define { flex in
    flex.addItem(label1)
    flex.addItem(label2)
    flex.addItem(label3)
        .grow(3)
}| 수정 전 | 수정 후 |
 |
 |
* 전체 코드: https://github.com/JK0369/ExFlexPinLayout
* 참고
'iOS 응용 (swift)' 카테고리의 다른 글
| [iOS - swift] Tuist로 모듈화 목차 (0) | 2023.03.11 |
|---|---|
| [iOS - swift] Lookin 사용 방법 (iOS 뷰 디버깅 툴, LookinServer) (0) | 2023.03.10 |
| [iOS - swift] 2. FlexLayout과 PinLayout 사용 방법 - 여백(margin, padding), 특정 뷰(Cell, scrollView), 기타(grow, shrink) (0) | 2023.03.08 |
| [iOS - swift] Carthage (카르타고) - 사용 방법 (Cartfile) (0) | 2023.03.06 |
| [iOS - swift] Carthage (카르타고) - 개념 Cocoapods과 비교하여 이해하기 (0) | 2023.03.05 |
Comments


