Notice
Recent Posts
Recent Comments
Link
| 일 | 월 | 화 | 수 | 목 | 금 | 토 |
|---|---|---|---|---|---|---|
| 1 | 2 | 3 | 4 | 5 | 6 | 7 |
| 8 | 9 | 10 | 11 | 12 | 13 | 14 |
| 15 | 16 | 17 | 18 | 19 | 20 | 21 |
| 22 | 23 | 24 | 25 | 26 | 27 | 28 |
Tags
- UITextView
- 클린 코드
- collectionview
- swiftUI
- uitableview
- Refactoring
- combine
- 스위프트
- uiscrollview
- rxswift
- Protocol
- 애니메이션
- Clean Code
- 리펙토링
- ios
- tableView
- RxCocoa
- Xcode
- Human interface guide
- Observable
- ribs
- map
- swift documentation
- 리팩토링
- HIG
- SWIFT
- MVVM
- scrollview
- UICollectionView
- clean architecture
Archives
- Today
- Total
김종권의 iOS 앱 개발 알아가기
[iOS - swift] 1. Push Notification 응용 - 테스트 방법 (Pusher, APNs) 본문
iOS 응용 (swift)
[iOS - swift] 1. Push Notification 응용 - 테스트 방법 (Pusher, APNs)
jake-kim 2023. 2. 17. 22:231. Push Notification 응용 - 테스트 방법 (Pusher, APNs) <
2. Push Notification 응용 - Silent Push Notification (사일런트 푸시, 푸시를 이용한 백그라운드에서 업데이트 방법)
3. Push Notification 응용 - Rich Push Notification (Notification Service Extension, 푸시 내용 변경하여 띄우기)
4. Push Notification 응용 - 시스템 푸시에 이미지 넣기 (Notification Service Extension, mutable-content)
5. Push Notification 응용 - 푸시 커스텀 UI 구현 방법 (Notification Content Extension, category)
6. Push Notification 응용 - 푸시 앱 아이콘 부분 커스텀 방법 (메시지 앱에서의 썸네일 아이콘 푸시 구현, 카톡 푸시 썸네일, INSendMessageIntent)
Push 테스트 환경 준비
- APNs 푸시를 발송하는 테스트 앱 Swifty Pusher 설치
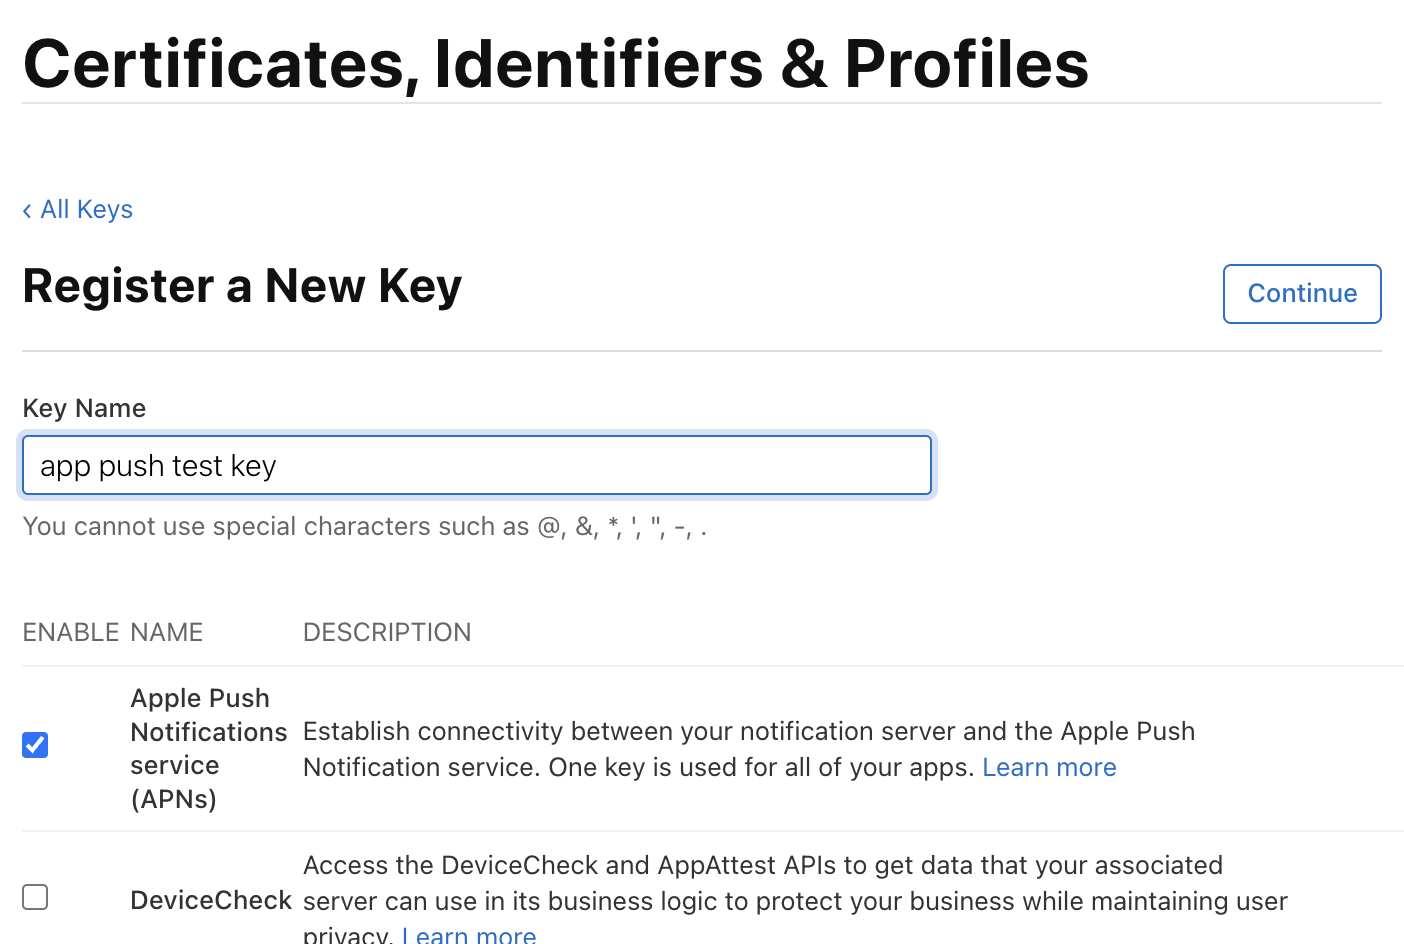
- 푸시를 발송하는 쪽에서 필요한 APNs key를 위해 Certificates, Identifiers & Profilees에서 key 등록

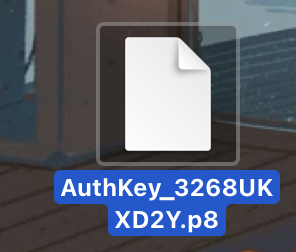
- 다운로드 받으면 .p8 형태

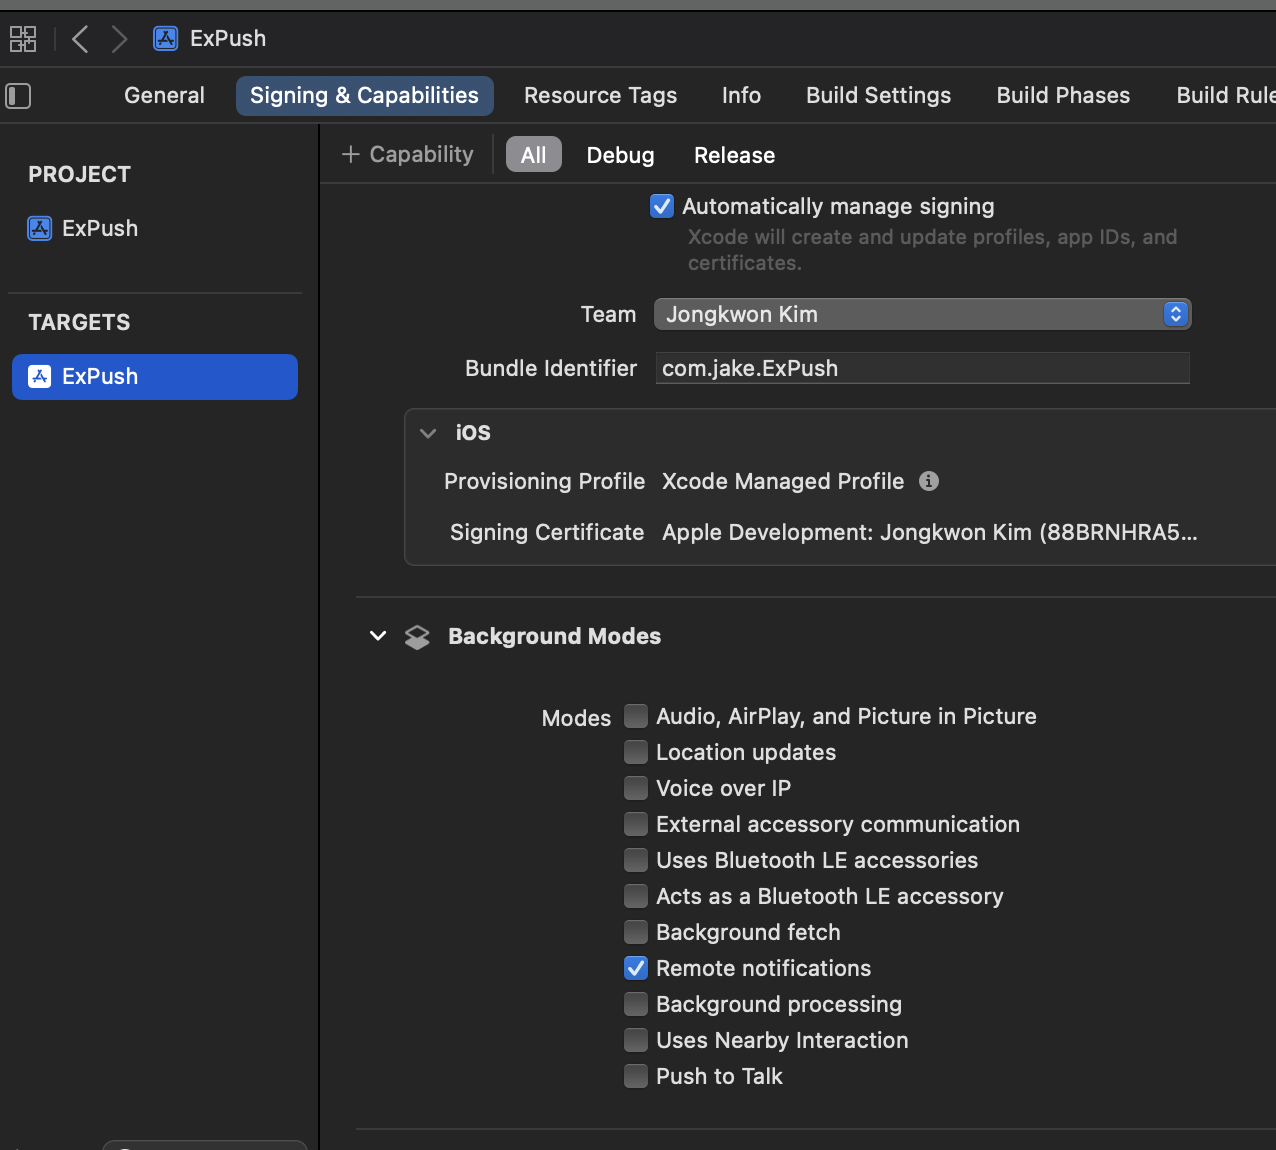
- Xcode > Push Notification 활성화
- Target > Signing & Capabilities > Capability > push notifications 선택

- Background Modes도 추가하고 Remote notifications 체크

- AppDelegate.swift에서 푸시 권한 요청 및 디바이스 토큰 등록
func application(_ application: UIApplication, didFinishLaunchingWithOptions launchOptions: [UIApplication.LaunchOptionsKey: Any]?) -> Bool {

    // 1. 푸시 권한 요청
    let center = UNUserNotificationCenter.current()
    center.requestAuthorization(options: [.alert, .badge, .sound]) { granted, error in
        print(granted)
    }

    // 2. device 토큰 획득: application(_:didRegisterForRemoteNotificationsWithDeviceToken:) 메소드 호출
    application.registerForRemoteNotifications()

    return true
}

func application(_ application: UIApplication, didRegisterForRemoteNotificationsWithDeviceToken deviceToken: Data) {
    let tokenString = deviceToken.map { String(format: "%02.2hhx", $0) }.joined()
    print(tokenString)
}- foreground에서도 푸시가 보이게끔 delegate 추가
- cf) 이 밖의 푸시 관련 처리 메소드들 개념은 이전 포스팅 글, 푸시 메소드들 총 정리 참고
let center = UNUserNotificationCenter.current()
center.delegate = self
...

extension AppDelegate: UNUserNotificationCenterDelegate {
    // foreground에서 시스템 푸시를 수신했을 때 해당 메소드가 호출
    func userNotificationCenter(_ center: UNUserNotificationCenter, willPresent notification: UNNotification, withCompletionHandler completionHandler: @escaping (UNNotificationPresentationOptions) -> Void) {
        completionHandler([.sound, .badge, .banner])
    }
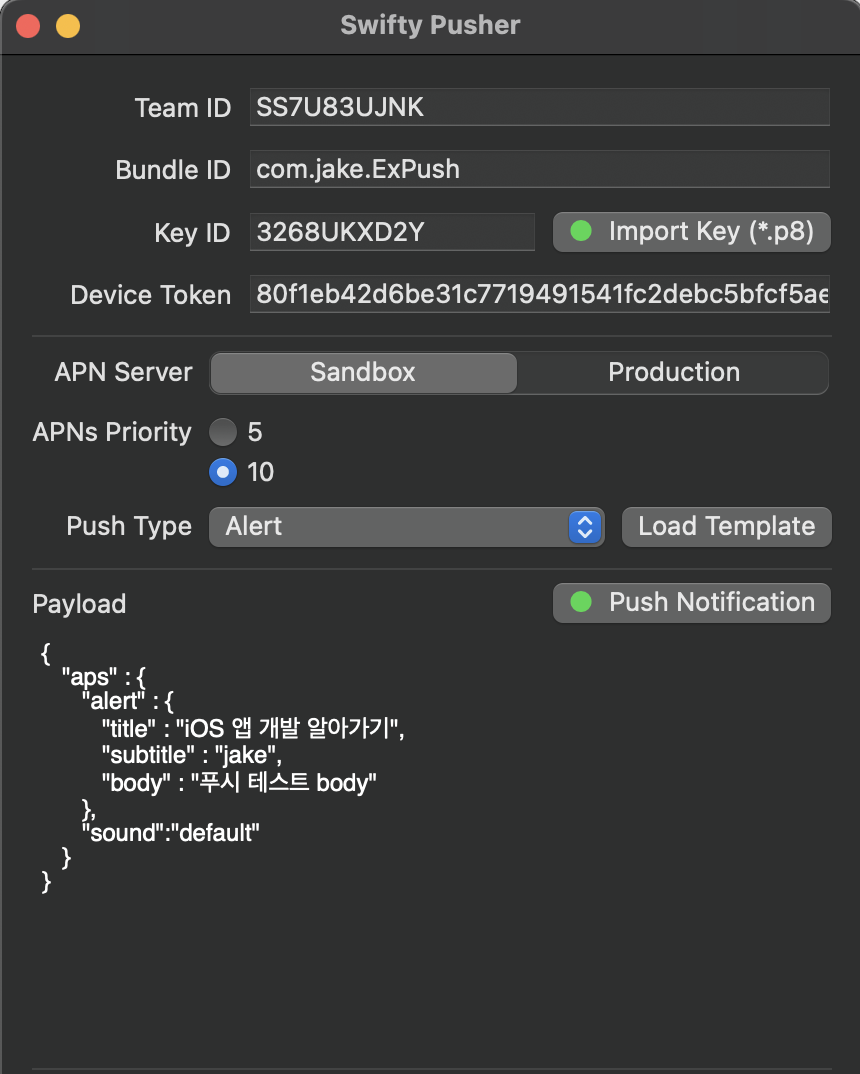
}- Swifty pusher 앱을 실행하고 정보 입력
- device token은 sandbox APN server로 발송하여 테스트
(앱스토어에서 설치한 앱만 Production APN server 사용함)
- device token은 sandbox APN server로 발송하여 테스트
(payload 코드)
{
   "aps" : {
      "alert" : {
         "title" : "iOS 앱 개발 알아가기",
         "subtitle" : "jake",
         "body" : "푸시 테스트 body"
      },
      "sound":"default"
   }
}
- Push Notification 버튼 클릭하여 푸시 전송
- 만약 푸시 전송 시 에러가 뜨면 아래 Provisioning profile 세팅작업이 필요 (APNs는 푸시를 보낼 때 notification 기능이 활성화된 provisioning profile이 필요하기 때문)

Provisioning profile 세팅
- Certificates, Identifiers & Profilees에서 앱 ID 등록
- (구체적인 앱 ID 등록 방법은 이전 포스팅 글 참고)

- provisioning profile 생성
- (구체적인 앱 provisioning profile 등록 방법은 이전 포스팅 글 참고)

- Provisioning profile까지 만들면 완성
- Xcode > Target > Signing & Capabilities에서 아무런 warning이 뜨지 않는다면 완료

* 전체 코드: https://github.com/JK0369/ExPushTest
* 참고
'iOS 응용 (swift)' 카테고리의 다른 글
Comments


